NeoCore Warudo Plugin

Installation Process
1. Install Warudo
2. Plugin Installation
- Download Warudo Plugin
- Extract the downloaded zip file and copy the plugin to Warudo Plugins folder
- Warudo Editor -> Menu -> Open Data Folder -> Plugins
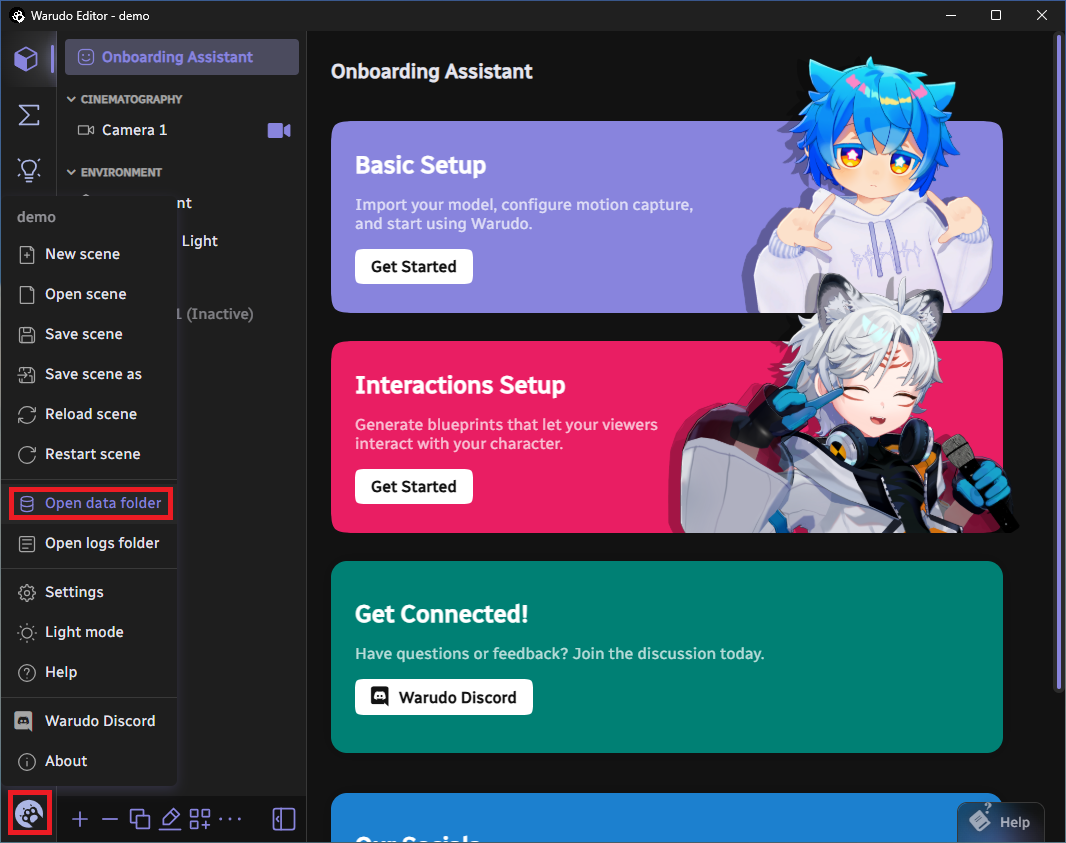
- Warudo Editor -> Menu -> Open Data Folder -> Plugins

Using the Plugin
1. Enable Warudo Plugin in NeoCore
- Go to Edit > Plugins

- In the Streaming section, toggle Warudo
 2. Attach WarudoLink component to an actor
- Select an actor and click Add Component > WarudoLink

3. Rename WarudoLink subject
- Select an actor. In the Details panel, you can change the default subject name in the WarudoLink component. This name will appear in the Server list in Warudo.
 4. Setting up network discovery IP address and port
Go to Edit > Project Settings
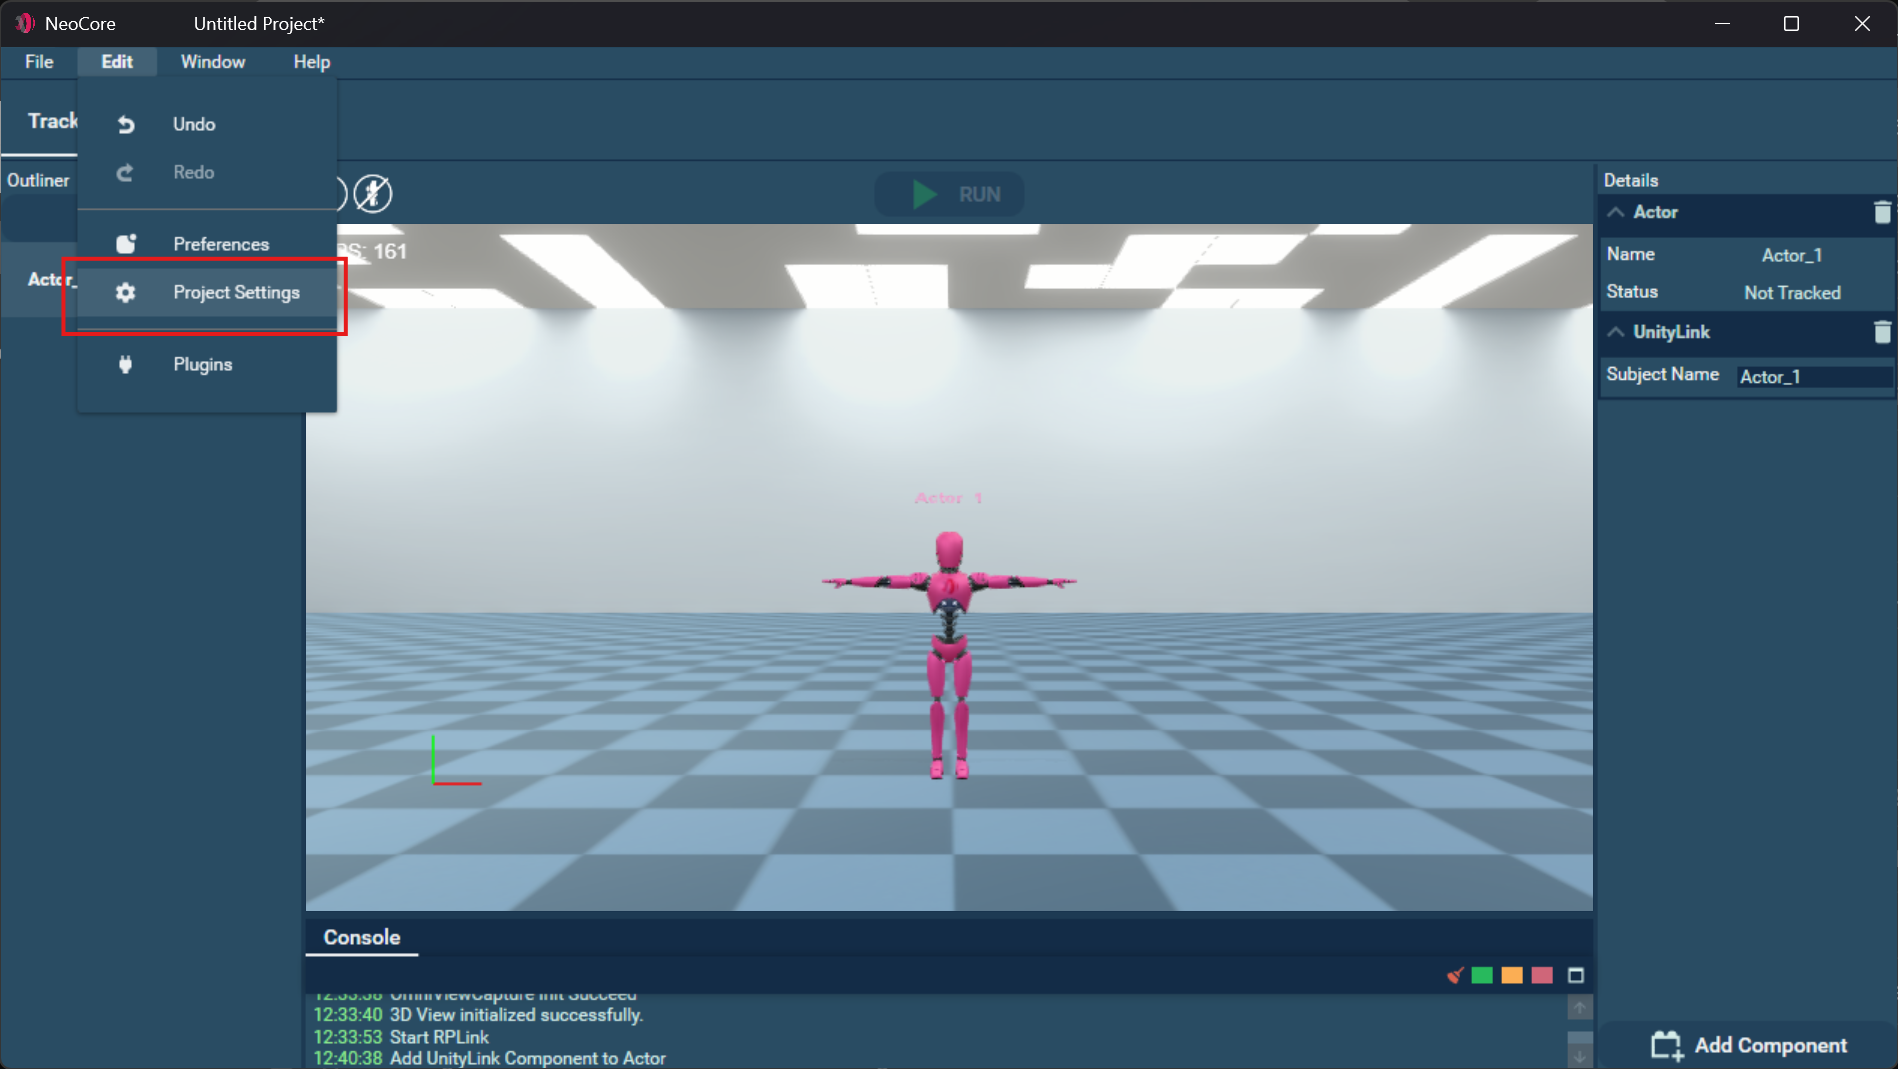
In the Networking section, find WarudoLink.
If your computer has multiple network adapters, you may need to type the IP of the adapter that the machine running Warudo can access.
In the Endpoint field, type [IP address]:[port] and click "Save".
After changing this value, you may need to disable and enable the Warudo plugin in Edit > Plugin > Streaming.


Setup in Warudo Editor
Select Character
- Select an existing character from the list, or create a new one by clicking the plus button and choose "character".
- Click "Source" dropdown list to select a character
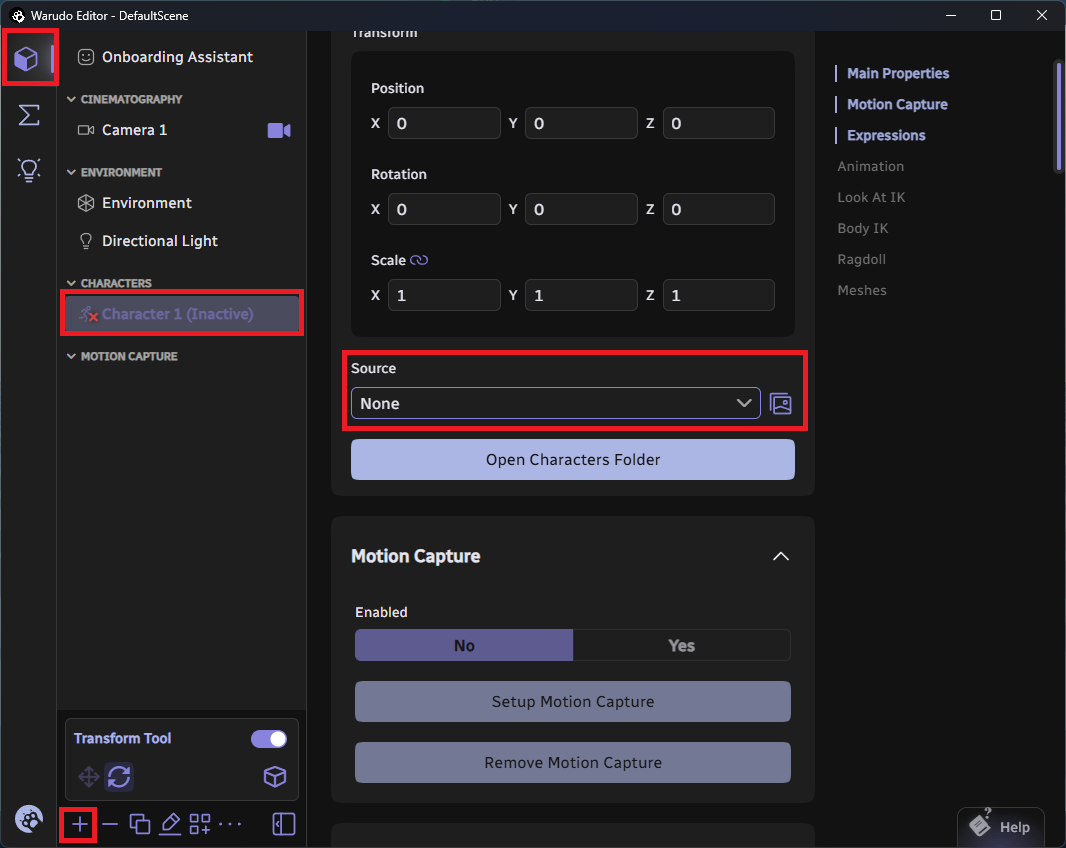

Setup Motion Capture
- After selecting a character, Click "Setup Motion Capture"
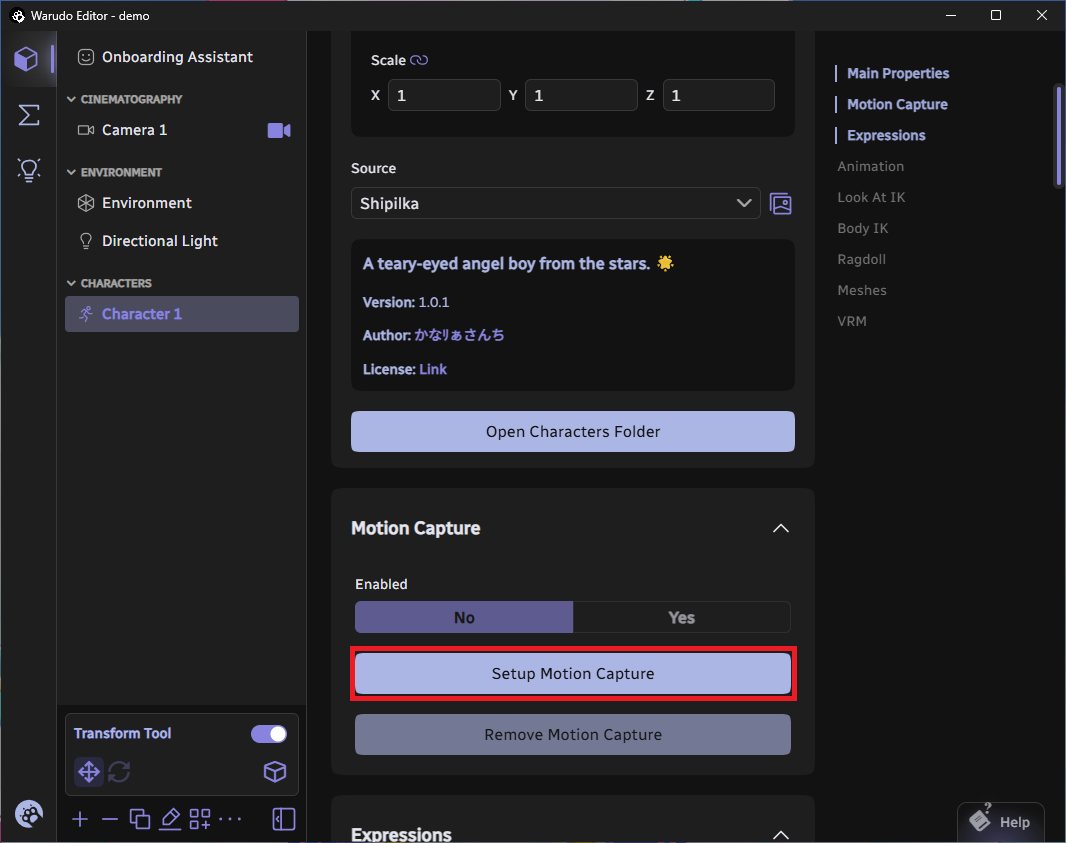

Setup Lip Sync
- Select Mediapipe
- Set "Input Camera" to empty
- Set "Enable Head and Body Movements" to No
- Set "Idle Head Animation" to "Disabled"
- Set "Lip Sync" to "Always Enable"
- Set "Microphone" to the device you want to use as microphone
- Click "OK"
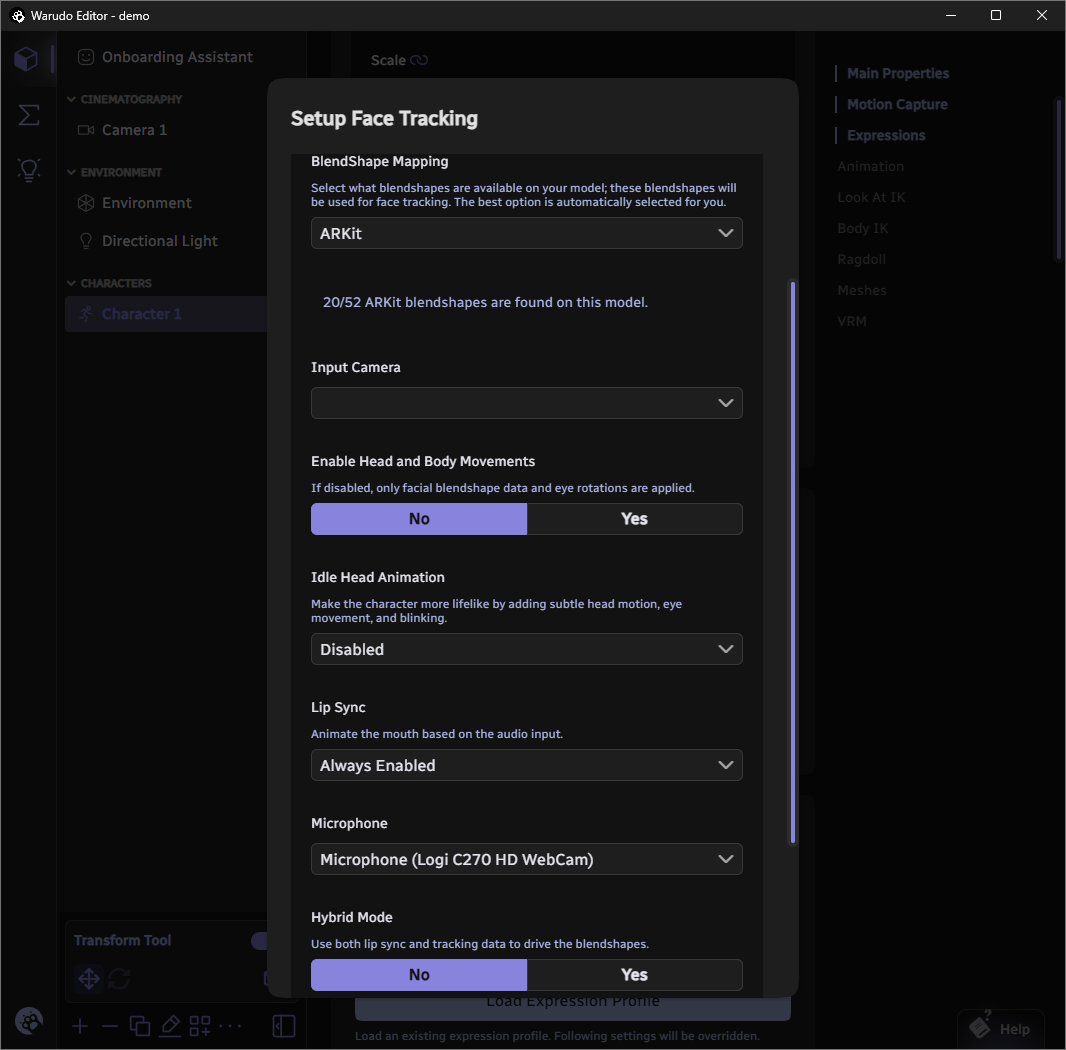
- or Select None if you don't need lip sync

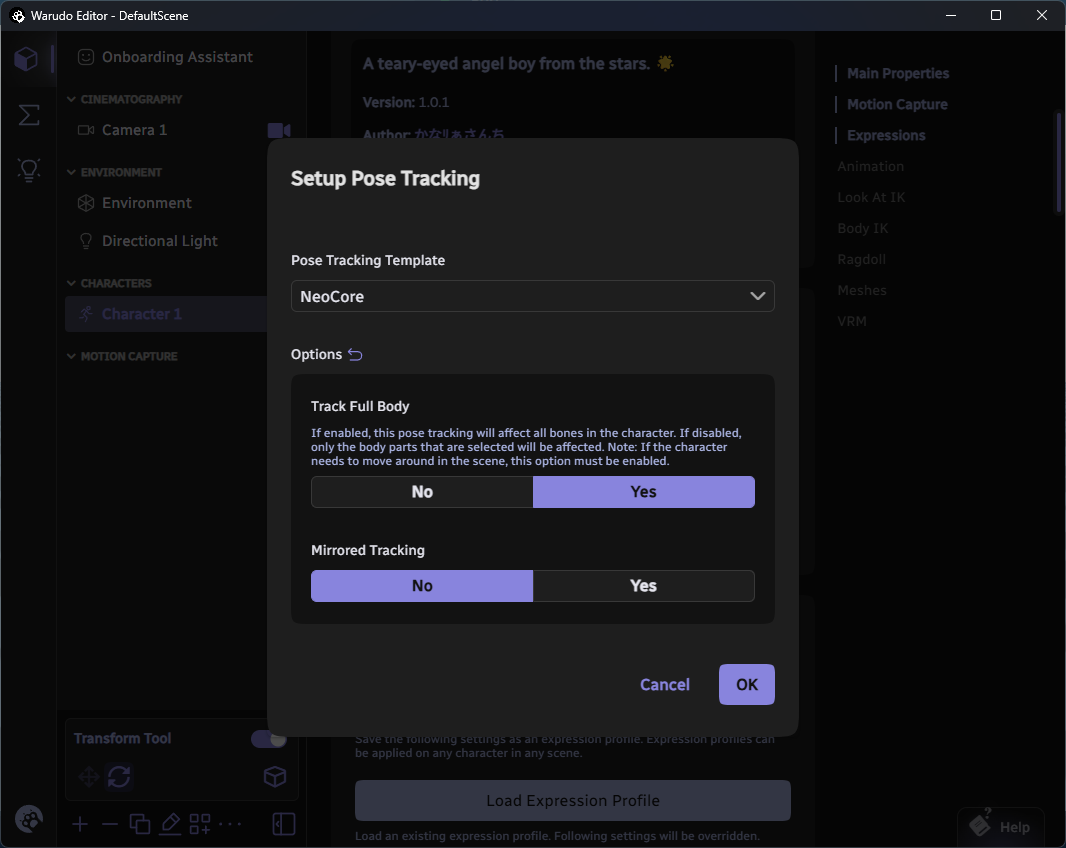
Setup Pose Tracking
- Select NeoCore for "Setup Pose Tracking" then Click "OK"
- In assets list, select "NeoCore Receiver", then select a Server from the dropdown list
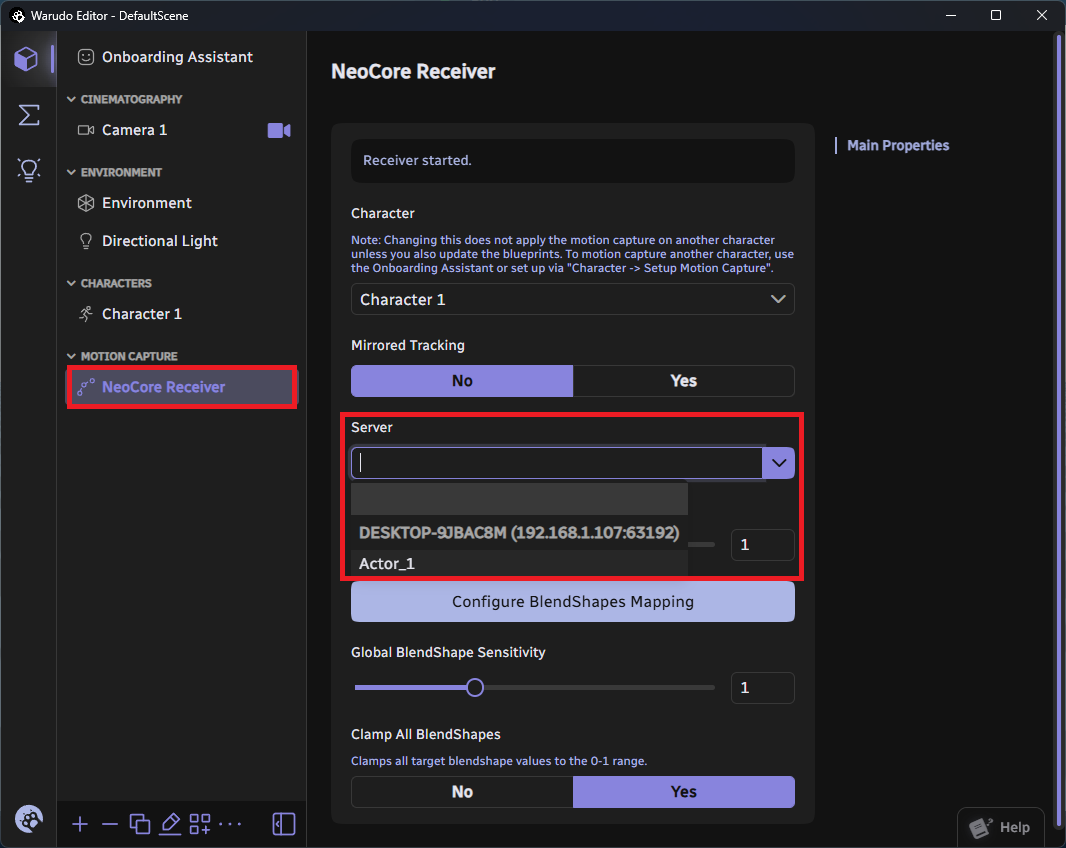
- Adjust "Shoulder Offset" if a character has narrower shoulders


Virtual camera
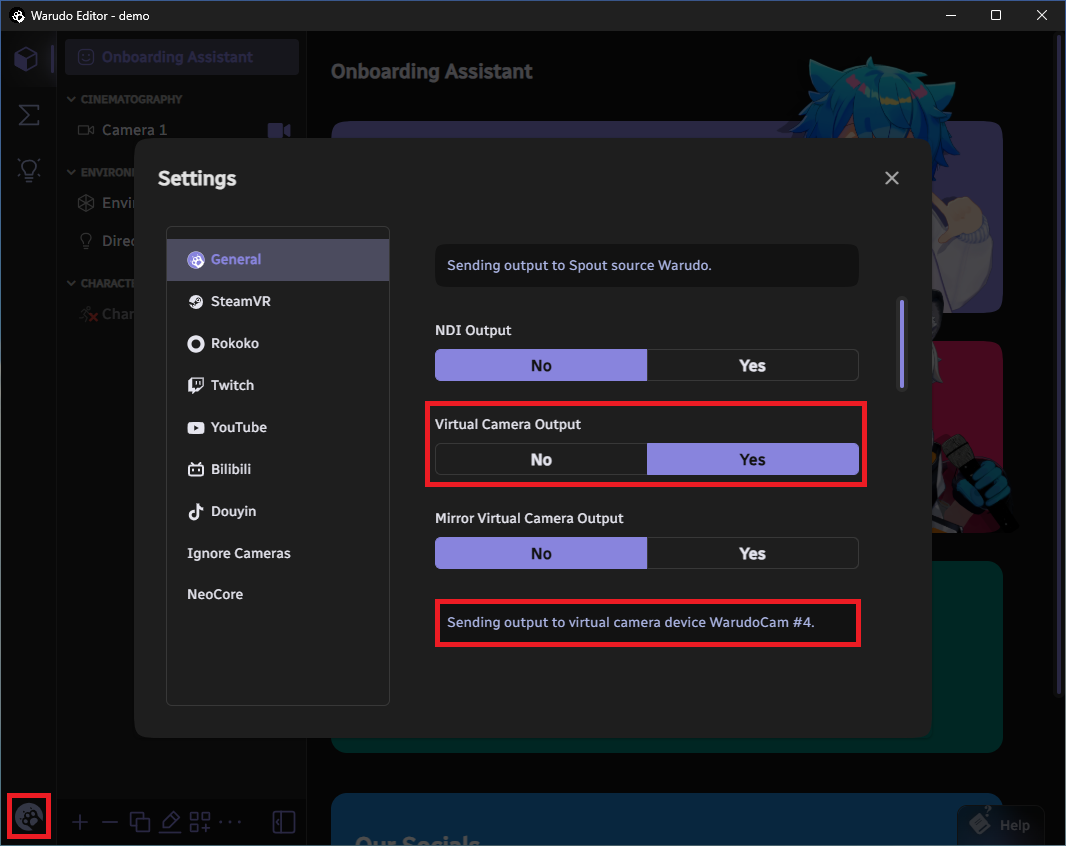
- Warudo support virtual camera output. Enable it from Menu -> Setting -> General -> Virtual Camera Output
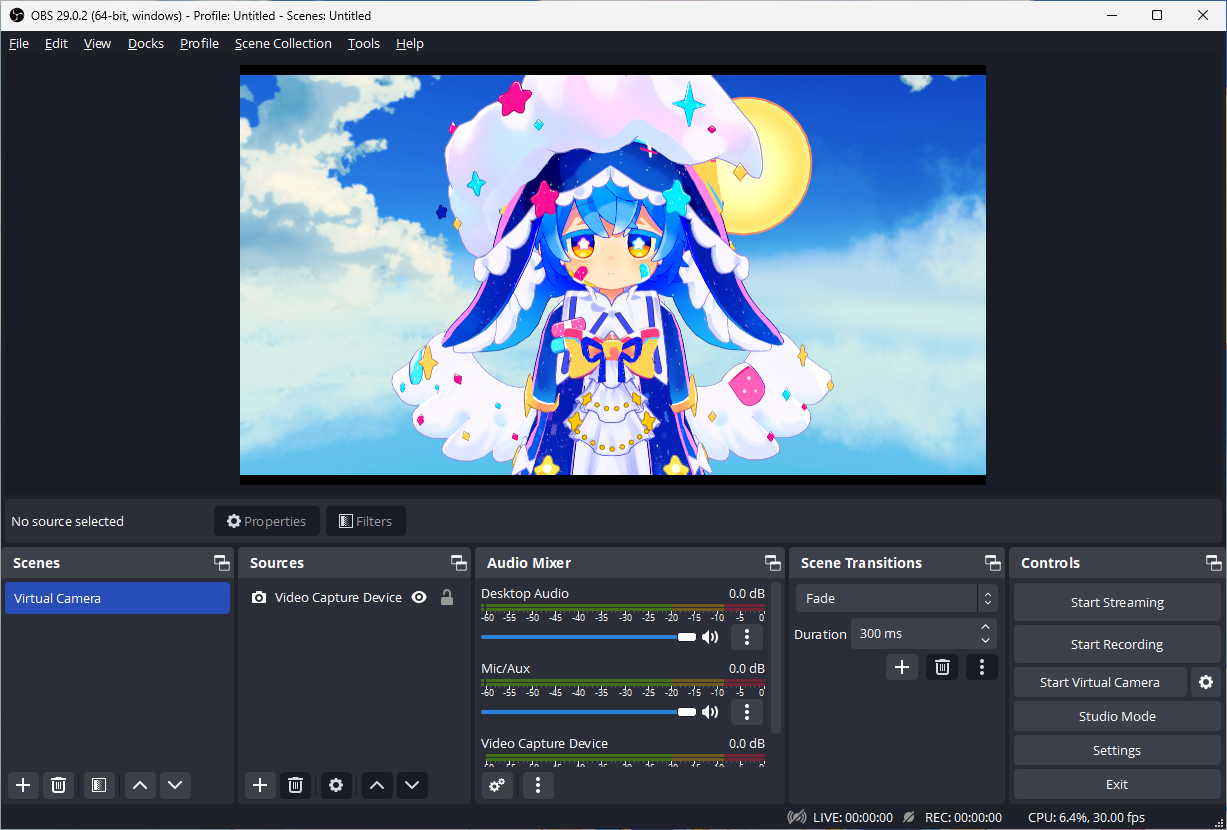
- Consume it using any software that support capturing camera. (for example: OBS)


Adjust listning port
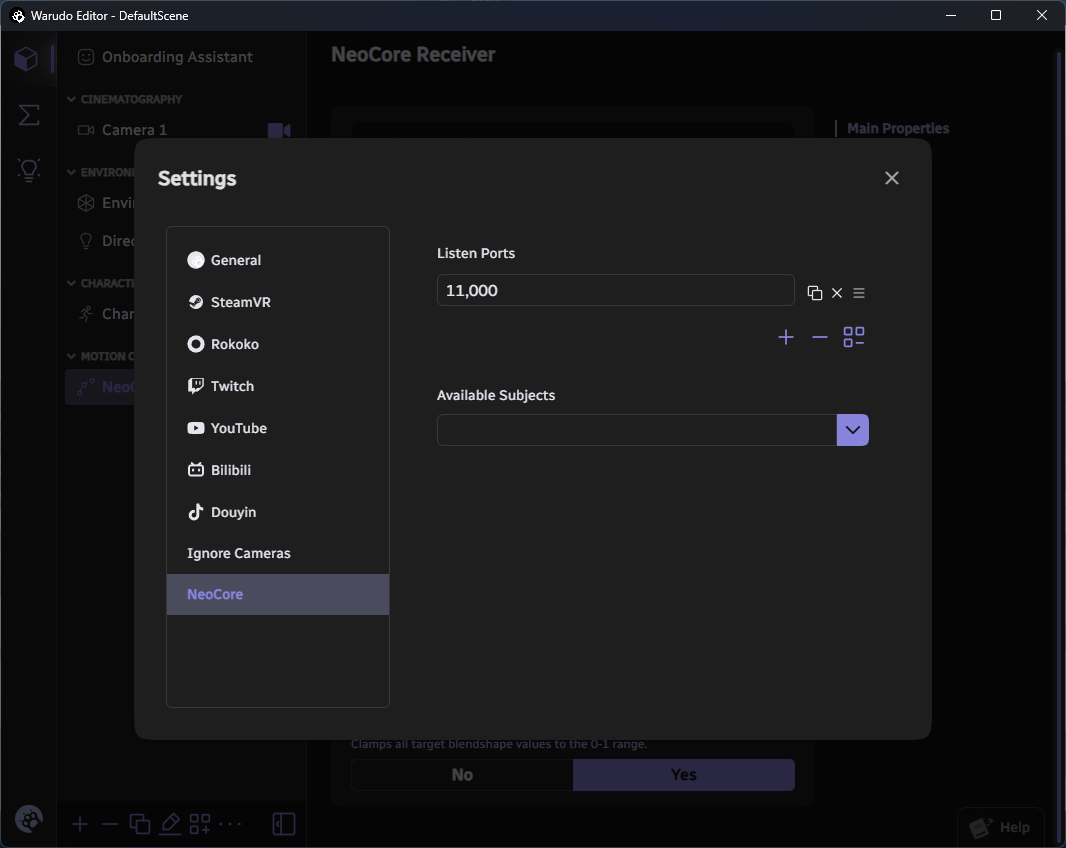
- If you want to change the port for communicating with NeoCore, change the ports from Menu -> Settings -> NeoCore