NeoCore Motionbuilder Plugin
Installation Process
1. Download Plugin
Download the latest Neocore Motionbuilder plugin:
2. Plugin Installation
- Inside the downloaded zip file there are two files:
- NeoCoreLink.dll
- redpillicon.png
- For Motionbuilder 2025:
- Copy NeoCoreLink.dll to C:\Program Files\Autodesk\MotionBuilder 2025\bin\x64\plugins
- Copy redpillicon.png to C:\Program Files\Autodesk\MotionBuilder 2025\bin\system
- For Motionbuilder 2026:
- Copy NeoCoreLink.dll to C:\Program Files\Autodesk\MotionBuilder 2026\bin\x64\plugins
- Copy redpillicon.png to C:\Program Files\Autodesk\MotionBuilder 2026\bin\system
Using the Plugin
1. Enable Motionbuilder Plugin in NeoCore
- Go to Edit > Plugins

- In Streaming section toggle Motionbuilder

2. Attach MobuLink component to an actor
- Select an actor and click Add Component > MobuLink

3. Rename MobuLink subject
- Select an actor and in the Details panel you can change the default subject name in the MobuLink component. This name will appear in the Device subject list in Motionbuilder

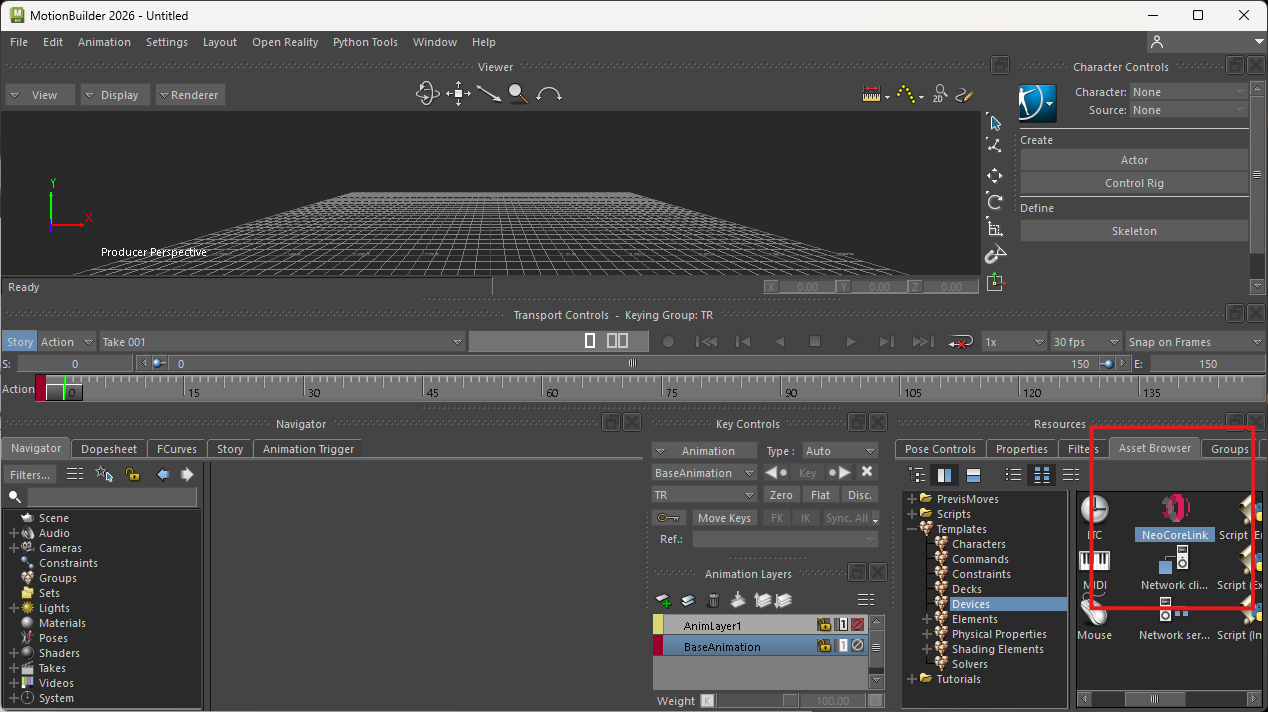
4. Adding NeoCoreLink device
- In Motionbuilder under devices find NeoCoreLink and drag it to the viewport

5. Select the NeoCoreLink device
- The new device will be selected automatically but if not it can be found under Navigator > Devices
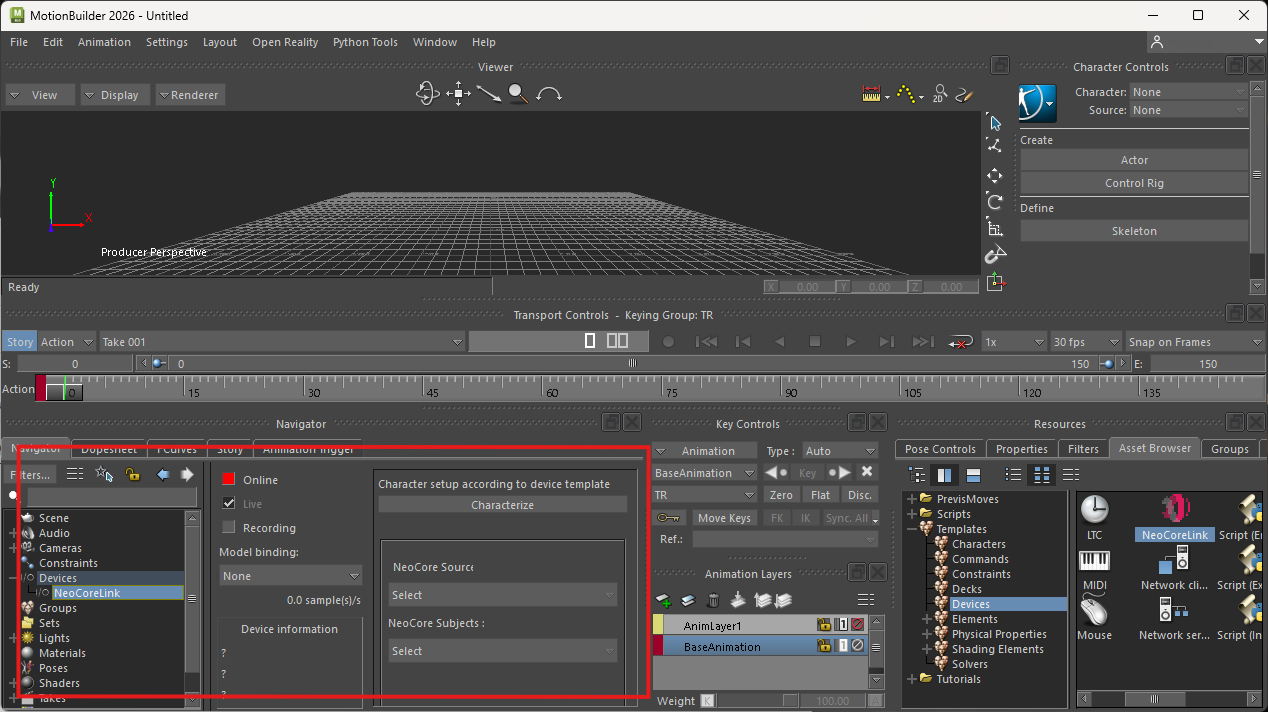

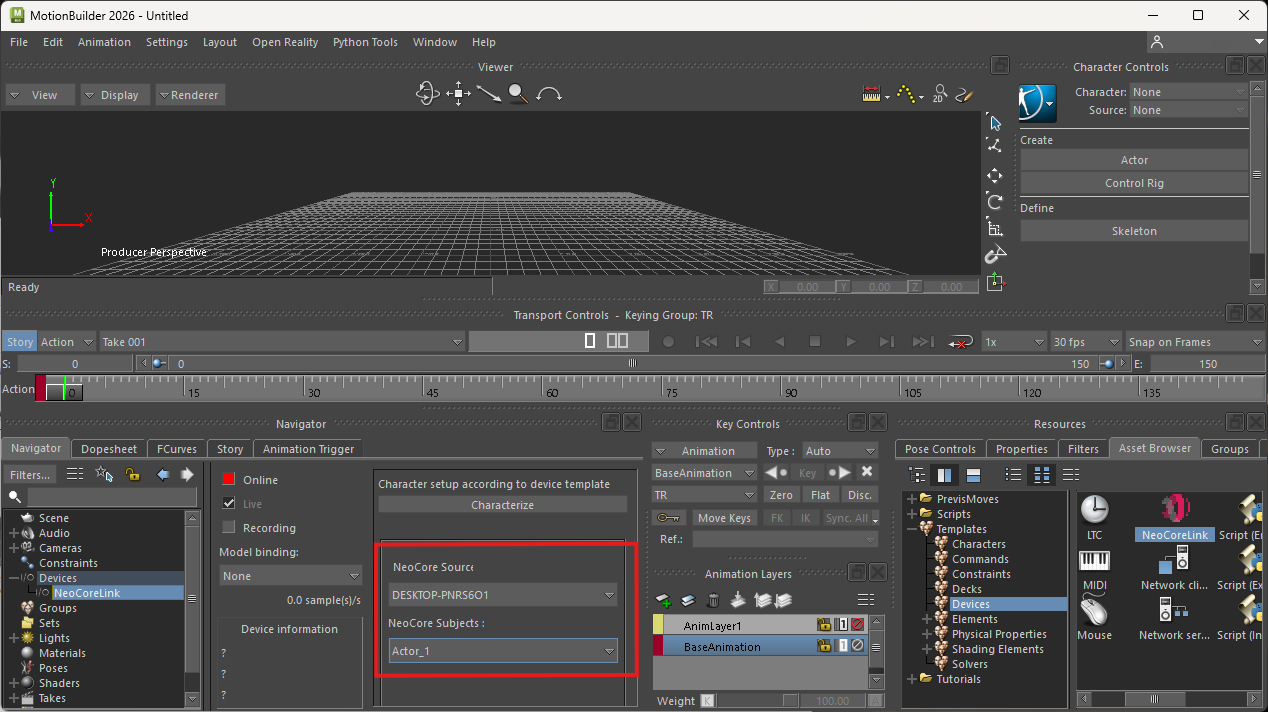
6. Select NeoCore Source and Subject
- Under NeoCore Sources select the PC name running NeoCore then select the actor name under NeoCore Subjects

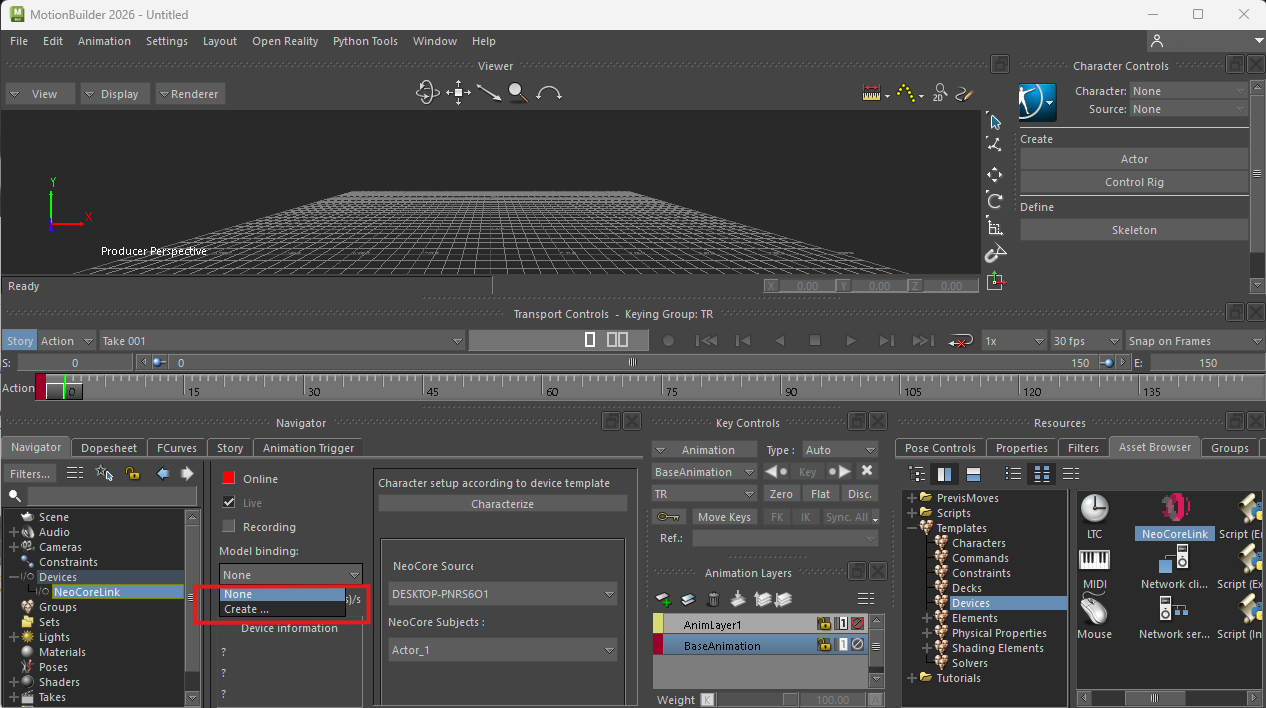
7. Creating Model Binding
- Under Model Bindings choose Create... to create a new NeoCore skeleton

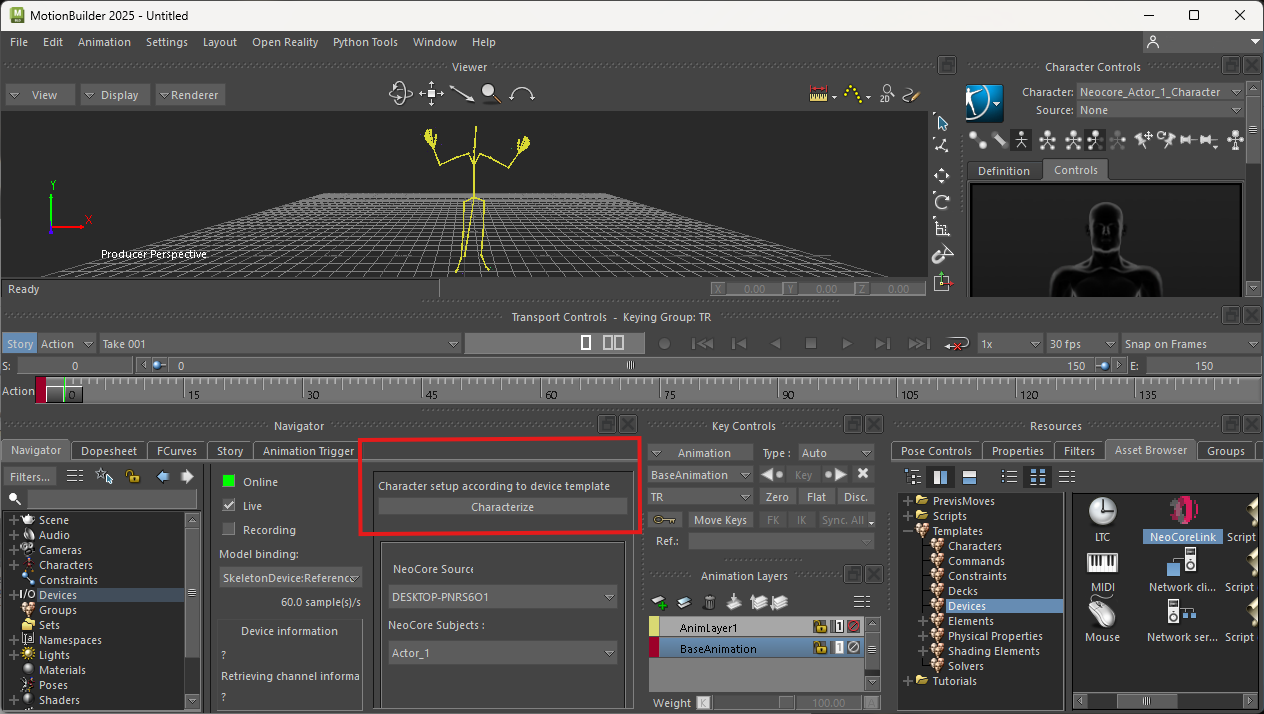
7. Characterize
- If you wish to use HumnIK for motion retargeting press the Characterize button at this stage while the skeleton is in T-Pose

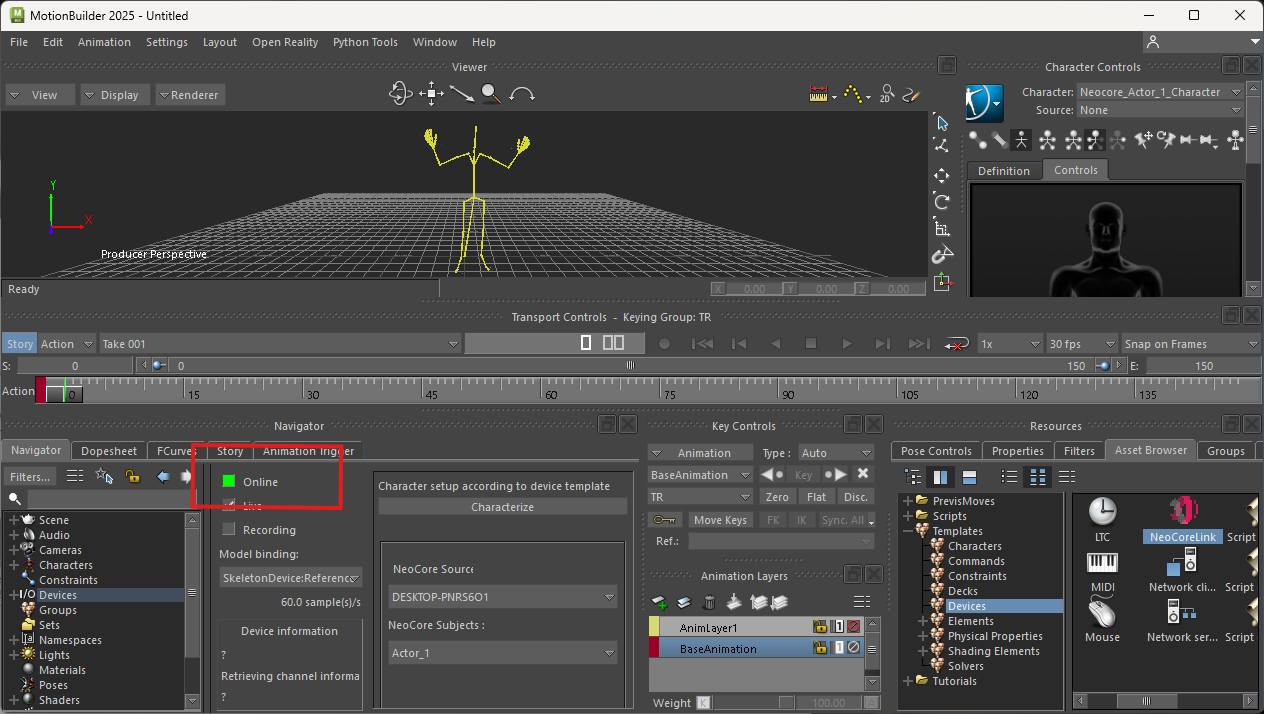
8. Connect to live stream
- Finally press the Online button to start receiving live data from NeoCore

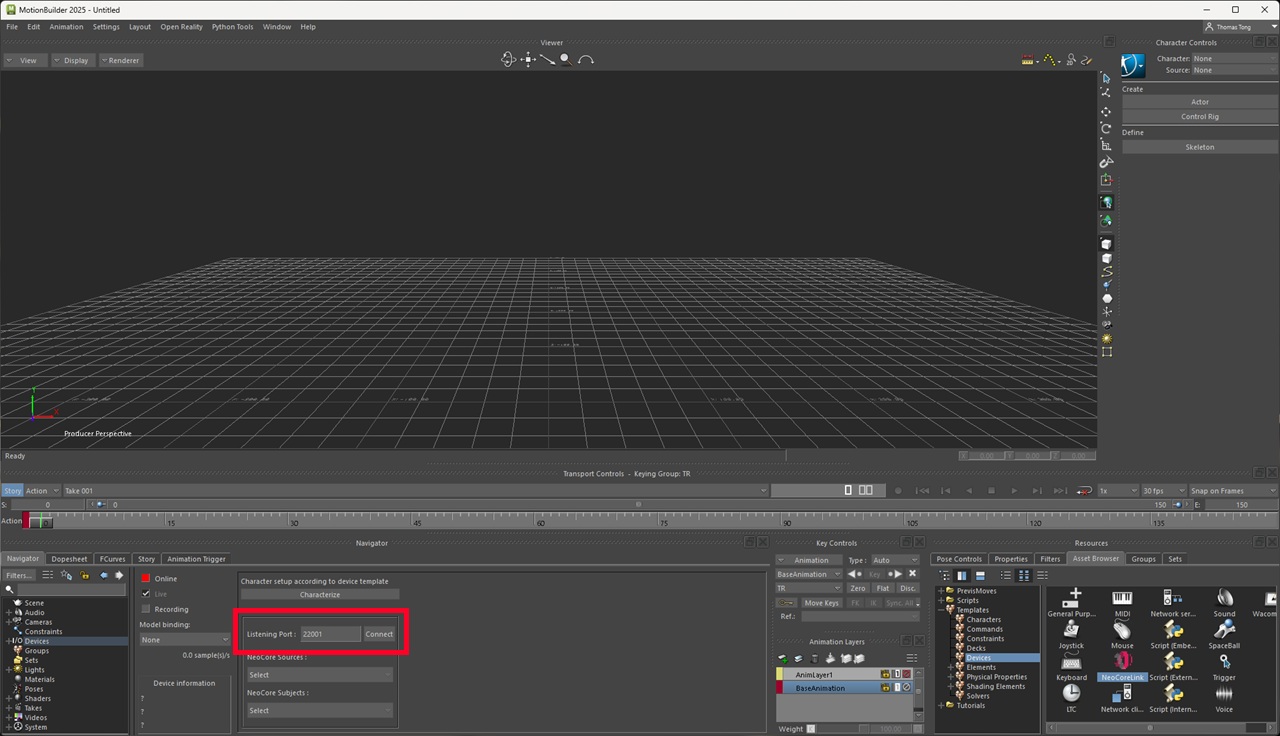
9. Change default listen port
- If you have changed the default broadcast port in the MotionBuilder plugin settings in NeoCore, make sure to set the same Listening Port here, then press Connect.