Red Pill Go Website
A starter guide on how to operate go.rplab.online.
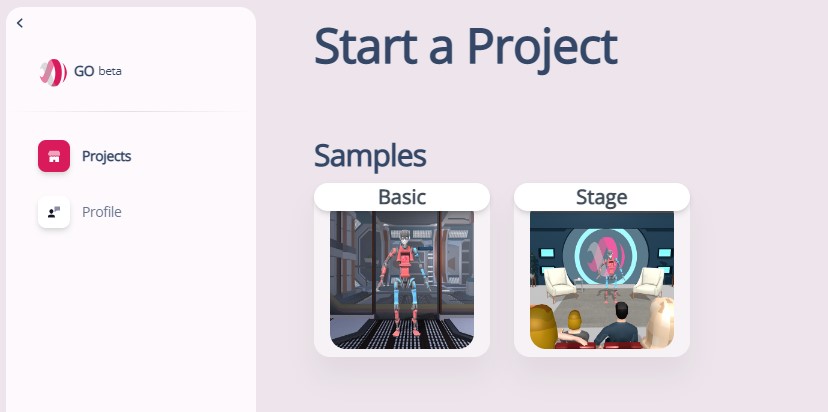
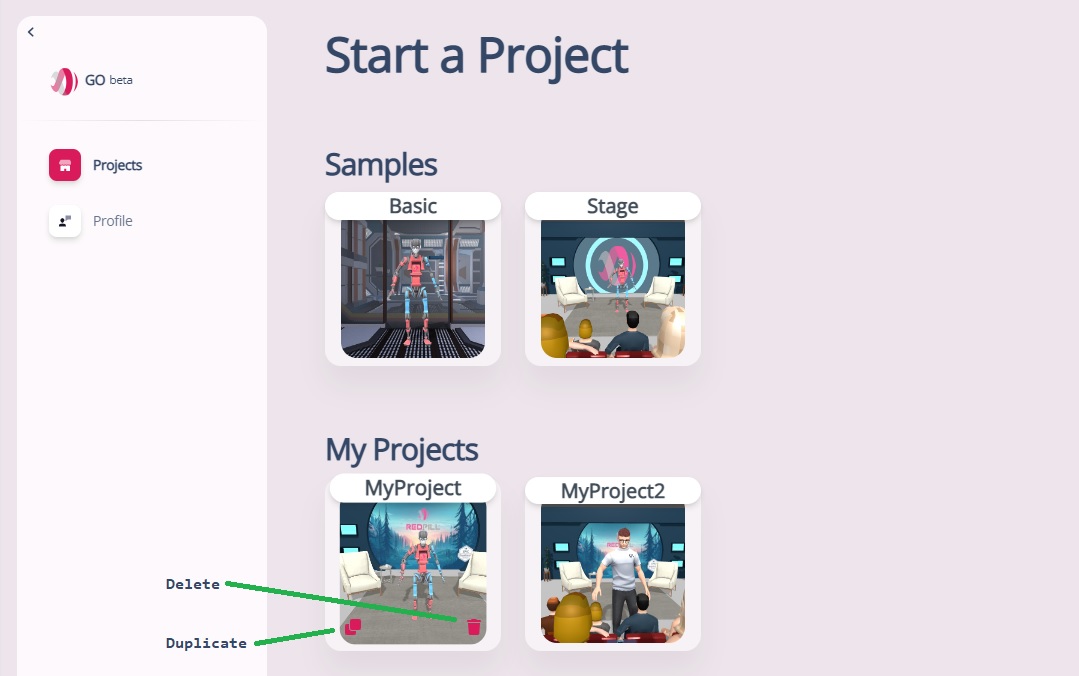
Project Templates
There are two project templates:
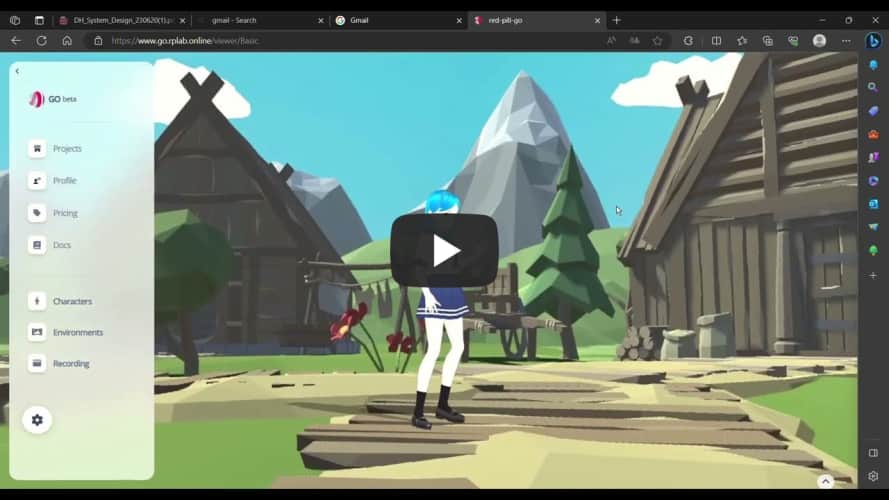
Basic
- Avatar and 360 image background
Details
- In this project template you can change the character and background.
- Record animation
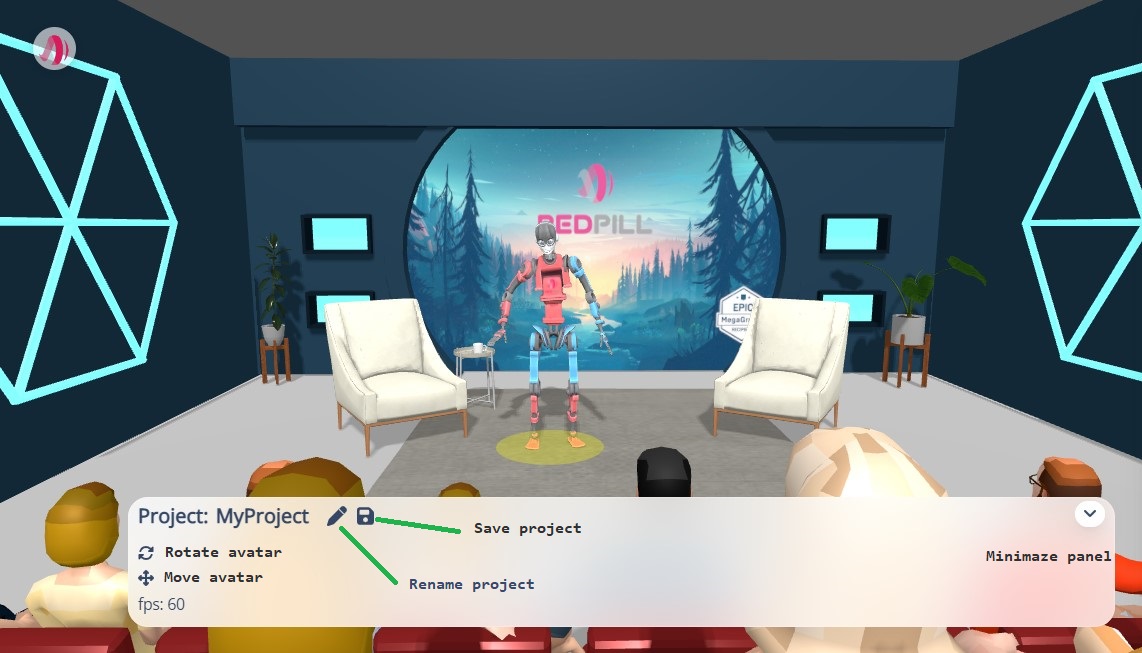
Stage
- Avatar in a 3D presentation room
Details
- In this project template you can change the character, move and rotate it.
- Create different camera views.
- Upload images to be displayed on the screen wall.
- Record animation
Create Project
To create a new project start from a template project. In the Project panel rename your new project then click save.
TIP
- Save you project periodically so you don't loose your modifications.
Duplicate or Delete Projects
Hover over a project card and click on the duplicate or delete buttons
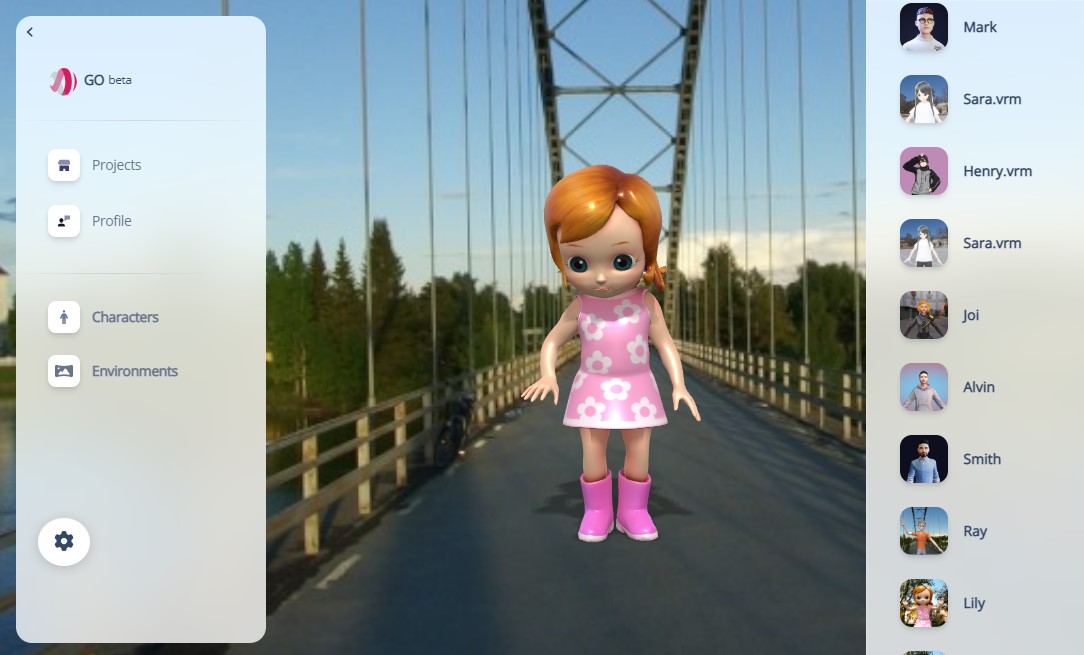
Change character and background
How to change the current avatar or background:
- Click on Characters in the side menu then select an avatar from the list on the right
- Click on Environments in the side menu then select a background from the list on the right
Connect to Animation Stream
To connect your avatar to the animation stream click on the gear button to expand the settings panel. Check the connection id in Red Pill Go Hub Windows app, Red Pill Go Android app or under your Red Pill Go Box device. Enter the number in the connection field and press the CONNECT button.
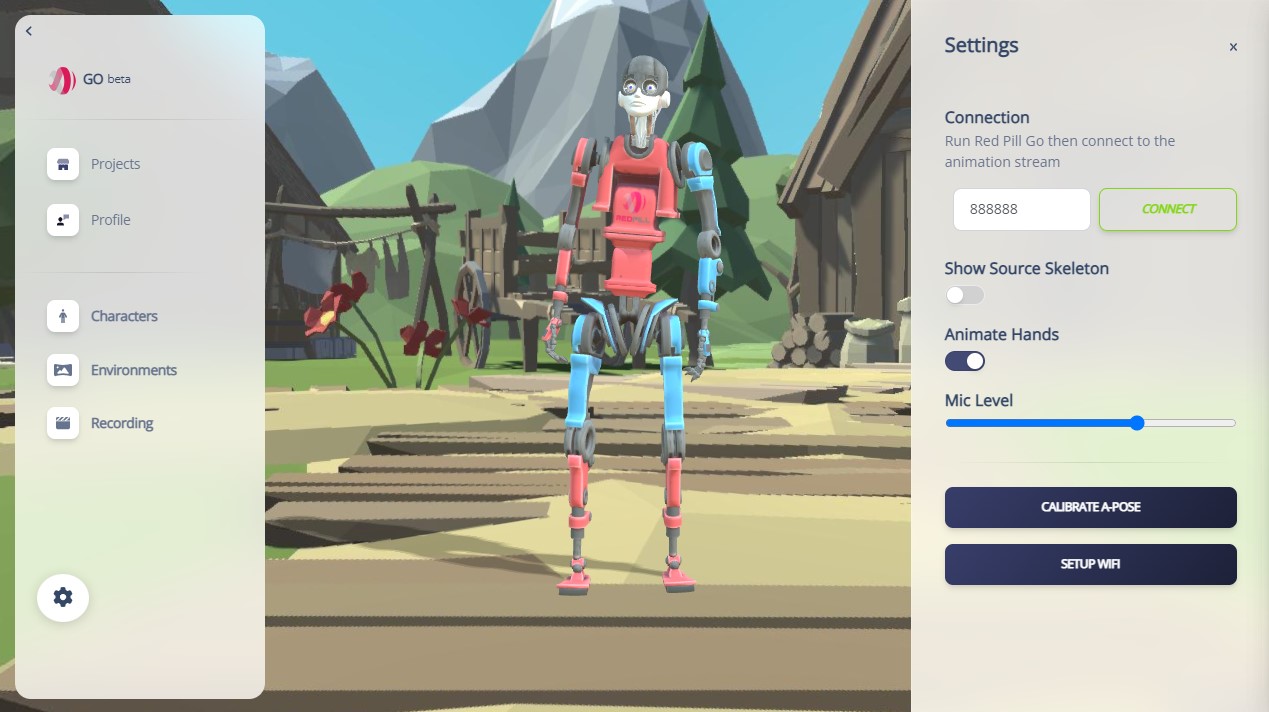
TIP
- To visualize the incoming 3d skeleton toggle Show Source Skeleton.
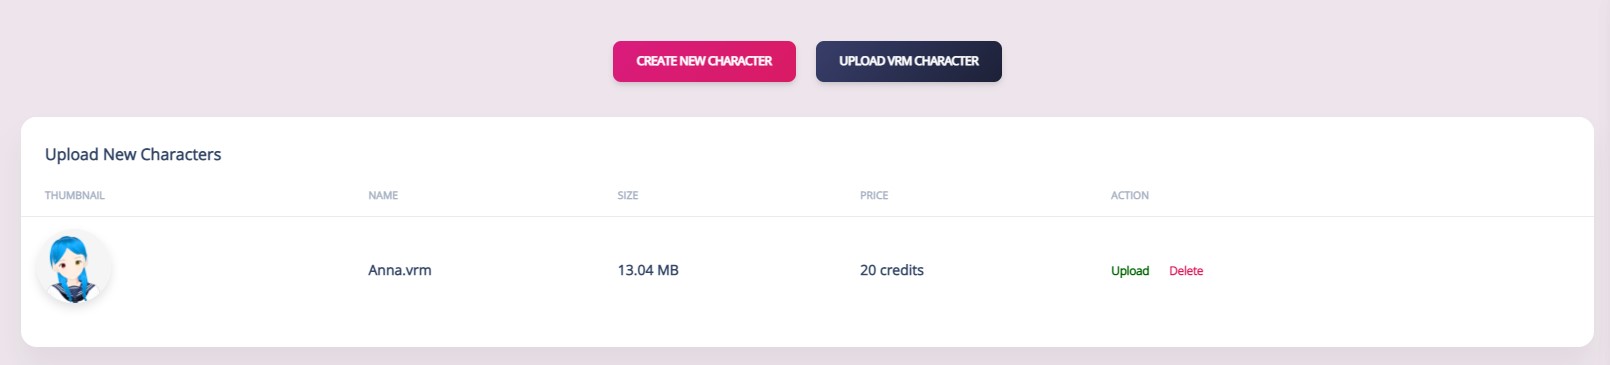
Custom Avatars
You can upload your own VRoid avatar or create a ReadPlayerMe avatar.
- Click "Profile" found on the left hand side of the screen.
- Click "Manage My Characters".
- Click "Create New Character" or "Upload VRM Character".
- "Create New Character" will open the Ready Player Me character creation tool
- "Upload VRM Character" lets you upload a .vrm file created in VRoid Studio or Unity UniVRM plugin
 4. Click on the Thumbnail to attach an avatar image.
- Click Upload to add the new avatar to your list.
INFO
Each custom avatars deducts 20 credits from your balance.
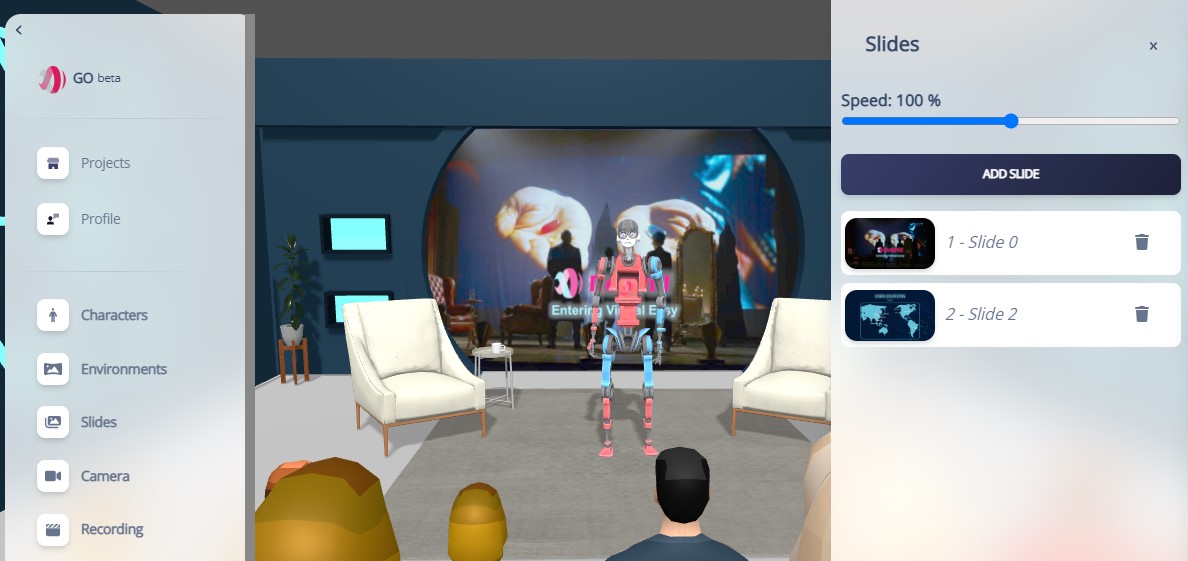
Slides
In projects based on the Stage template you can upload your own slides to be displayed on the virtual video wall
- Click "Slides" found on the left hand side of the screen.
- Click "Add Slide" in the Slide panel to upload an image.
- Drag and Drop slides to rearrange their order.
- Adjust how fast slides change on the screen by moving the "Speed" bar.
- Click on a side to display it instantly.
- Click on the trash icon to remove a slide.
Cameras
In projects based on the Stage template you can add multiple cameras with different behavior
- Click "Camera" found on the left hand side of the screen.
- Click "Add Camera" in the Camera panel to upload an image.
- Choose camera type.
- Adjust focal length (fov) and animation duration.
- Set start and stop positions.
- Click on the camera icon to look through that camera, click again to return to free camera mode.
- Click "Play All" to loop through all camera animations.
- Click "Stop Playback" to return back to free camera mode.
- Drag and Drop the arrow icon to rearrange cameras.
Camera Types:
- Fixed - fixed position and rotation
- Slider - smooth motion between two positions and fixed rotation
- Crane - smooth motion between two positions while the camera is oriented to the avatar

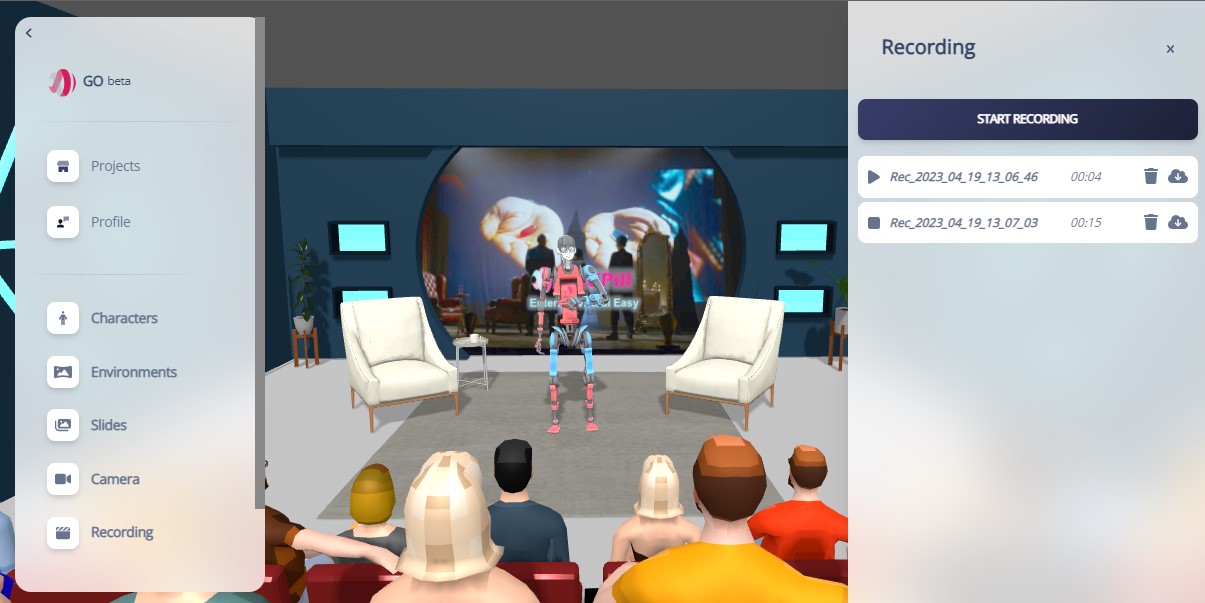
Animation Recording
The animation recording features allows you to record the animation data including skeleton motion, facial animation and voice. To access the animation recording:
- Click "Recording" found on the left hand side of the screen.
- Connect to an animation stream.
- Click "Start Recording" in the Recording panel on the right.
- Click "Stop Recording" then the new animation clip will be added to the list.
- Click the play/stop button to preview the clip.
- Choose an avatar to apply the animation to.
- Click the download icon to save the selected avatar with the animation applied together with the audio clip.
INFO
The price for downloading animation is calculated based on the selected avatar and animation length. Same animation clip applied to same avatar won't be charged the second time.
INFO
The exported 3D file format is GLB. In the case of a VRoid avatar they will also be converted to GLB. Note that toon materials will be converted to standard material and spring bones will have the animation key frames baked.
TIP
Save your project after recording so the animations will be uploaded and available for later use.
Tutorial