NeoCore
by Red Pill Lab
多人AI動作捕捉系統
安裝流程
1. 軟體安裝


- 點擊安裝檔案進行NeoCore安裝程序,完成後可開啟。
2. 軟體序號認證

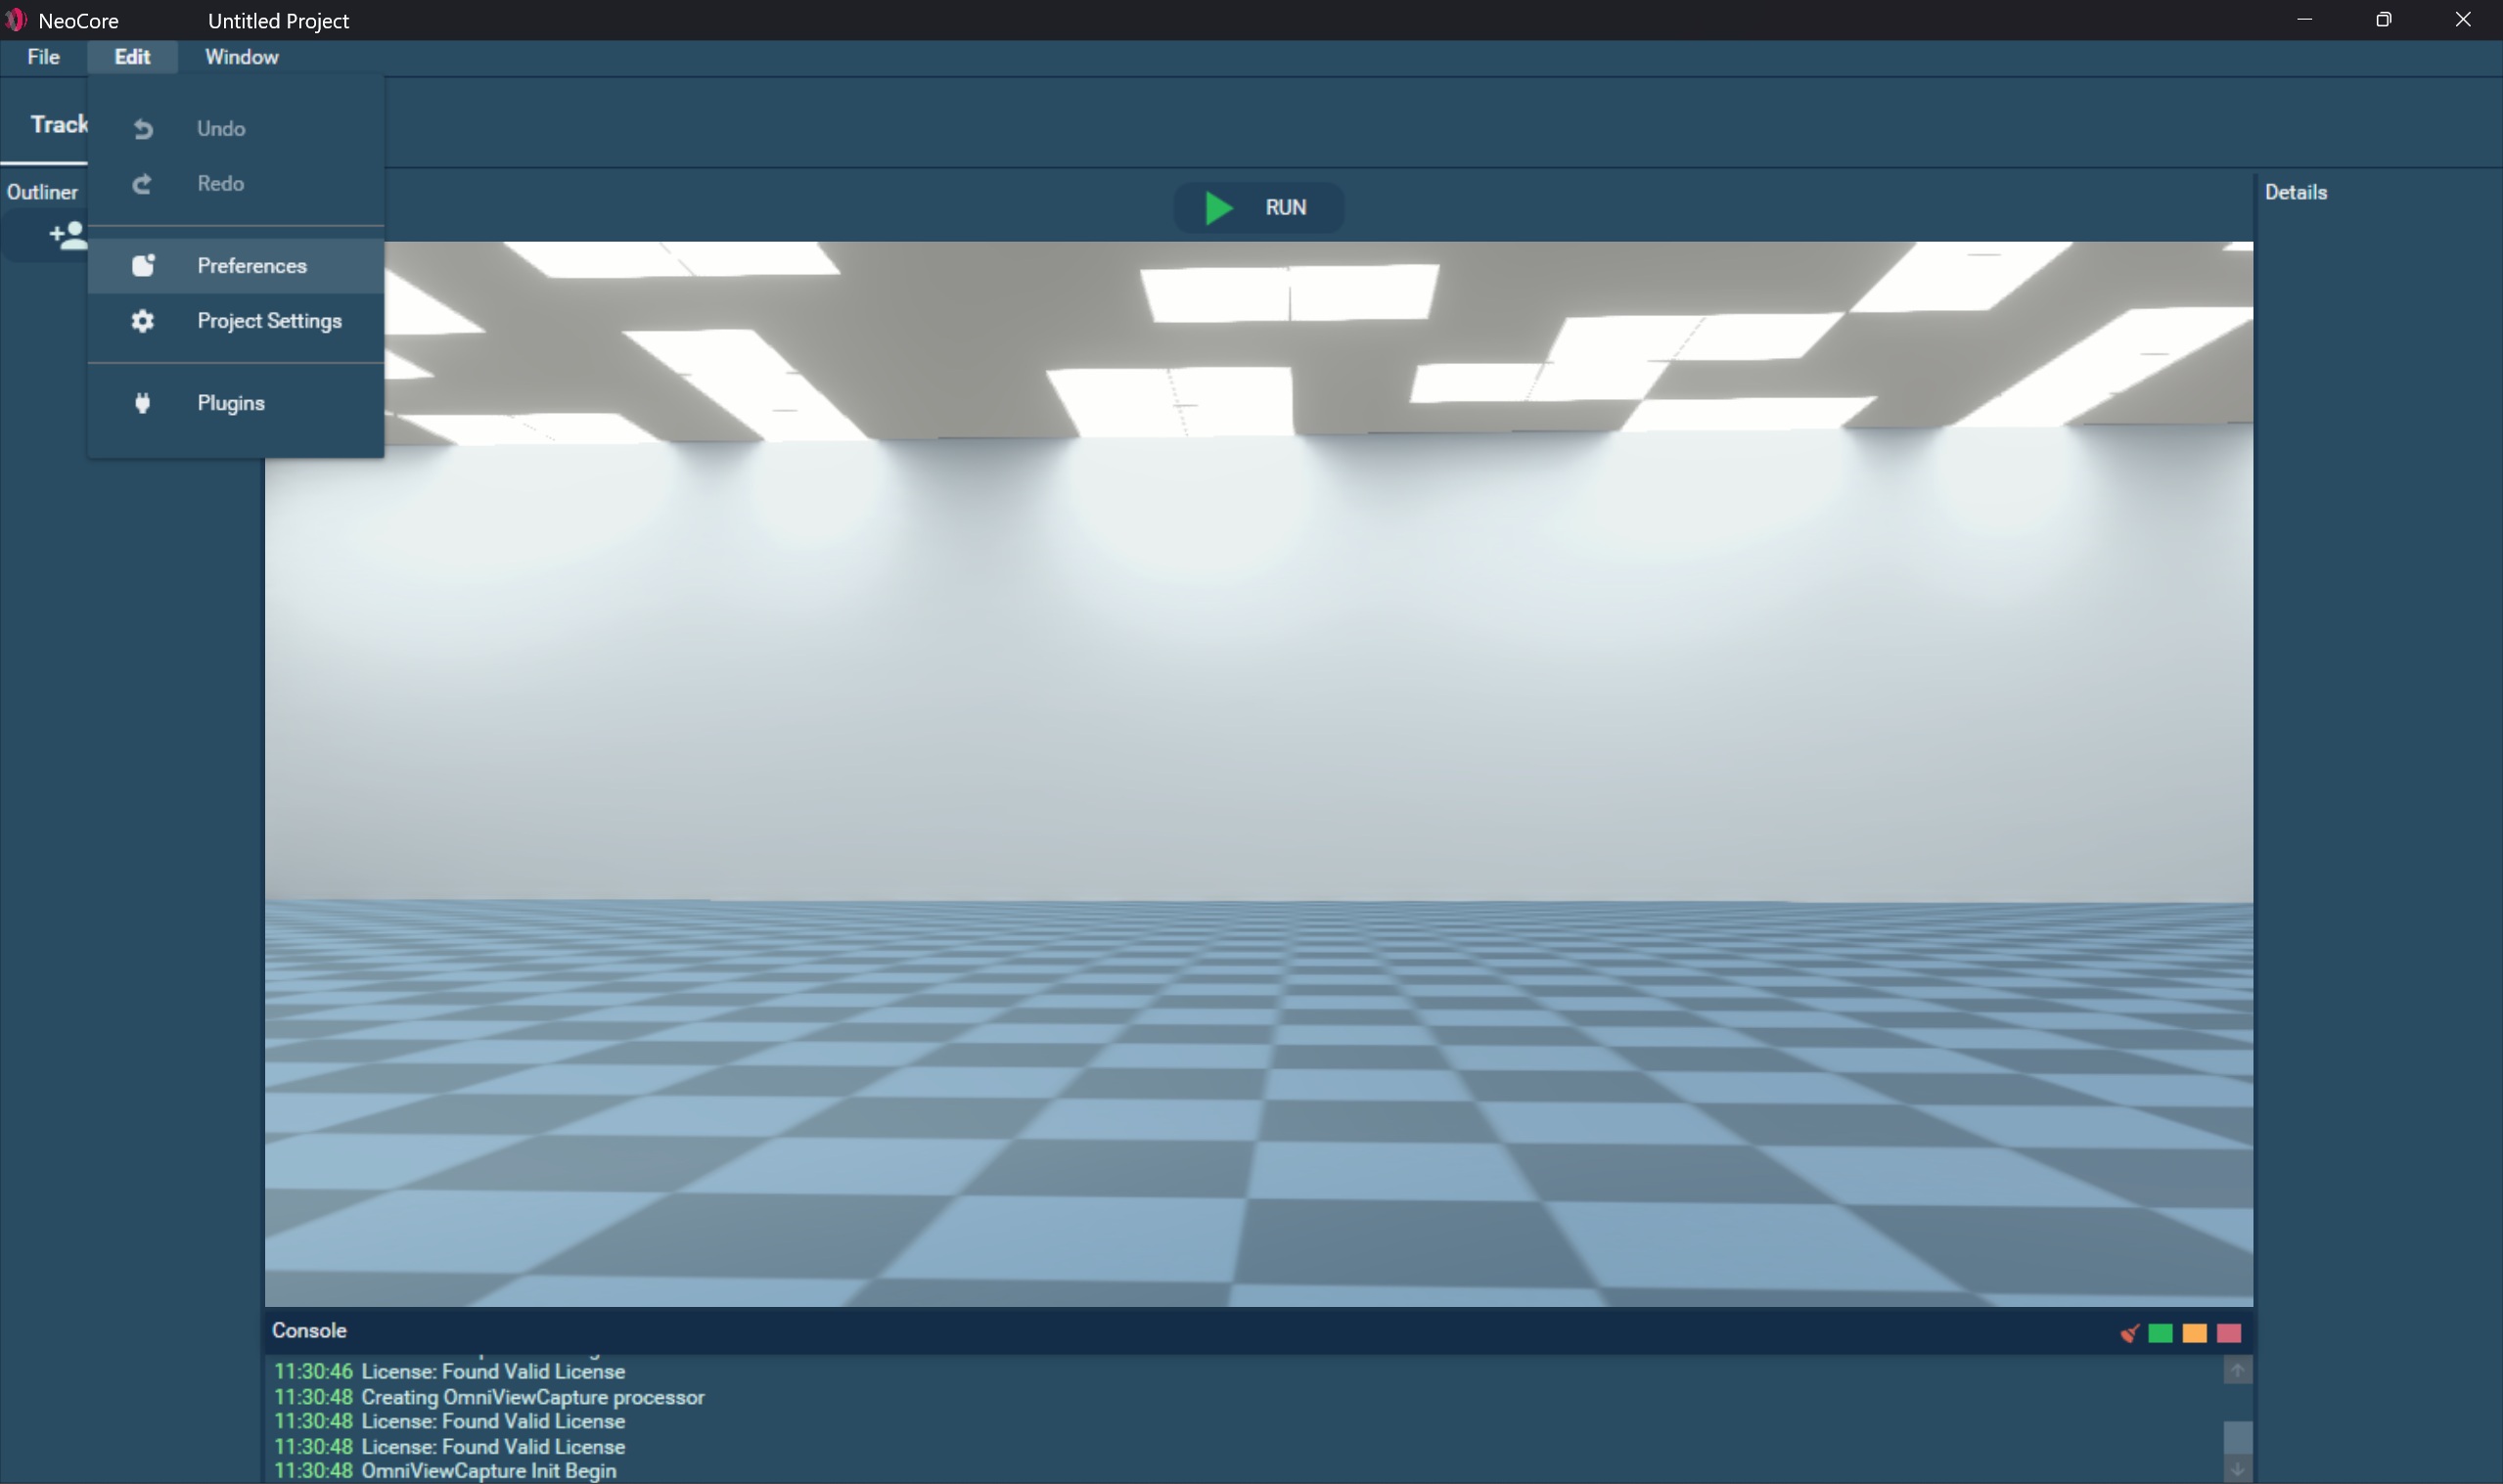
- 選擇Edit/Preferences輸入軟體序號(API Key)

- 按下連線後經雲端平台確認,顯示為註冊成功
3. GPU加速功能調校

- 系統於第一次安裝NeoCore時將採用TensorRT針對Nvidia GPU進行調校達到最佳AI功能。
- 此步驟約須5-10分鐘,調校完畢後以後不需再進行。

- 調校完成後於系統Console端將顯示OmniView Module Ready(綠色字體)
多鏡頭調校
1. 加入攝影機進行參數校正

- 由Camera Feed選擇加入新攝影機後按下"Add Camera"
- Neocore將自動抓取攝影機之預設fps及解析度

- 按下"Calibrate"後開始進行鏡頭內參數量測

採用OmniView A3尺寸校正版於鏡頭內按提示位置逐一擺放。
TIP
可先將板子拿遠至符合塞入整個提示框內位置後輕搖並旋轉以符合邊長,至上方綠色Bar全滿即完成一格。

- 全部12格皆完成拍照後即可按下Compute Camera Params進行參數計算

- 經數秒完成參數計算後可將板子放回進行測試,可看到每方格之頂點皆被CV鎖定

於已完成參數計算之攝影機右邊之Calibration結果欄位可選擇複製/貼上
TIP
若採用全部廠牌/型號皆相同之攝影機,完成第一支後可將參數複製予其他攝像頭加速流程
2. 使用Diamond Board抓取鏡頭分布位置

- 第一步可先將收到之Diamond Board按照數字提示方向進行組裝
- 組裝完成後放置於場地正中央,確保每台相機將看得到Diamond Board

- 按下3D標靶符號後,OmniView即自動獲取鏡頭位置,並於Diamond Board上標記數字
3. 儲存專案

完成上述之攝影機設置步驟後建議進行存檔以儲存目前所有參數設置。
未來開啟NeoCore後可直接開啟該專案即可馬上進行動捕
TIP
若未移動到任何一台攝影機,往後不需再進行Diamond Board抓取鏡頭位置步驟。
開始使用NeoCore
1. 開啟已儲存專案

- 由File開啟已儲存專案,可成功讀取各攝影機3D位置並顯示
2. 加入Actors

- 由Tracking tab按下"Add Actor"開始加入適當演員數量
3. 開始AI動作捕捉

- 由Camera Feed確認每台攝影機對準場地中央並可看到每位演員

按下Play Button開始進行NeoCore多人動態捕捉
TIP
每名表演者進場時需擺設T-Pose進行動作匹配後開始補捉
LiveLink
1. Activate LiveLink
- Obtain an API Key that has the LiveLink feature enabled.
- Go to Edit > Preferences and enter the software license (API Key).
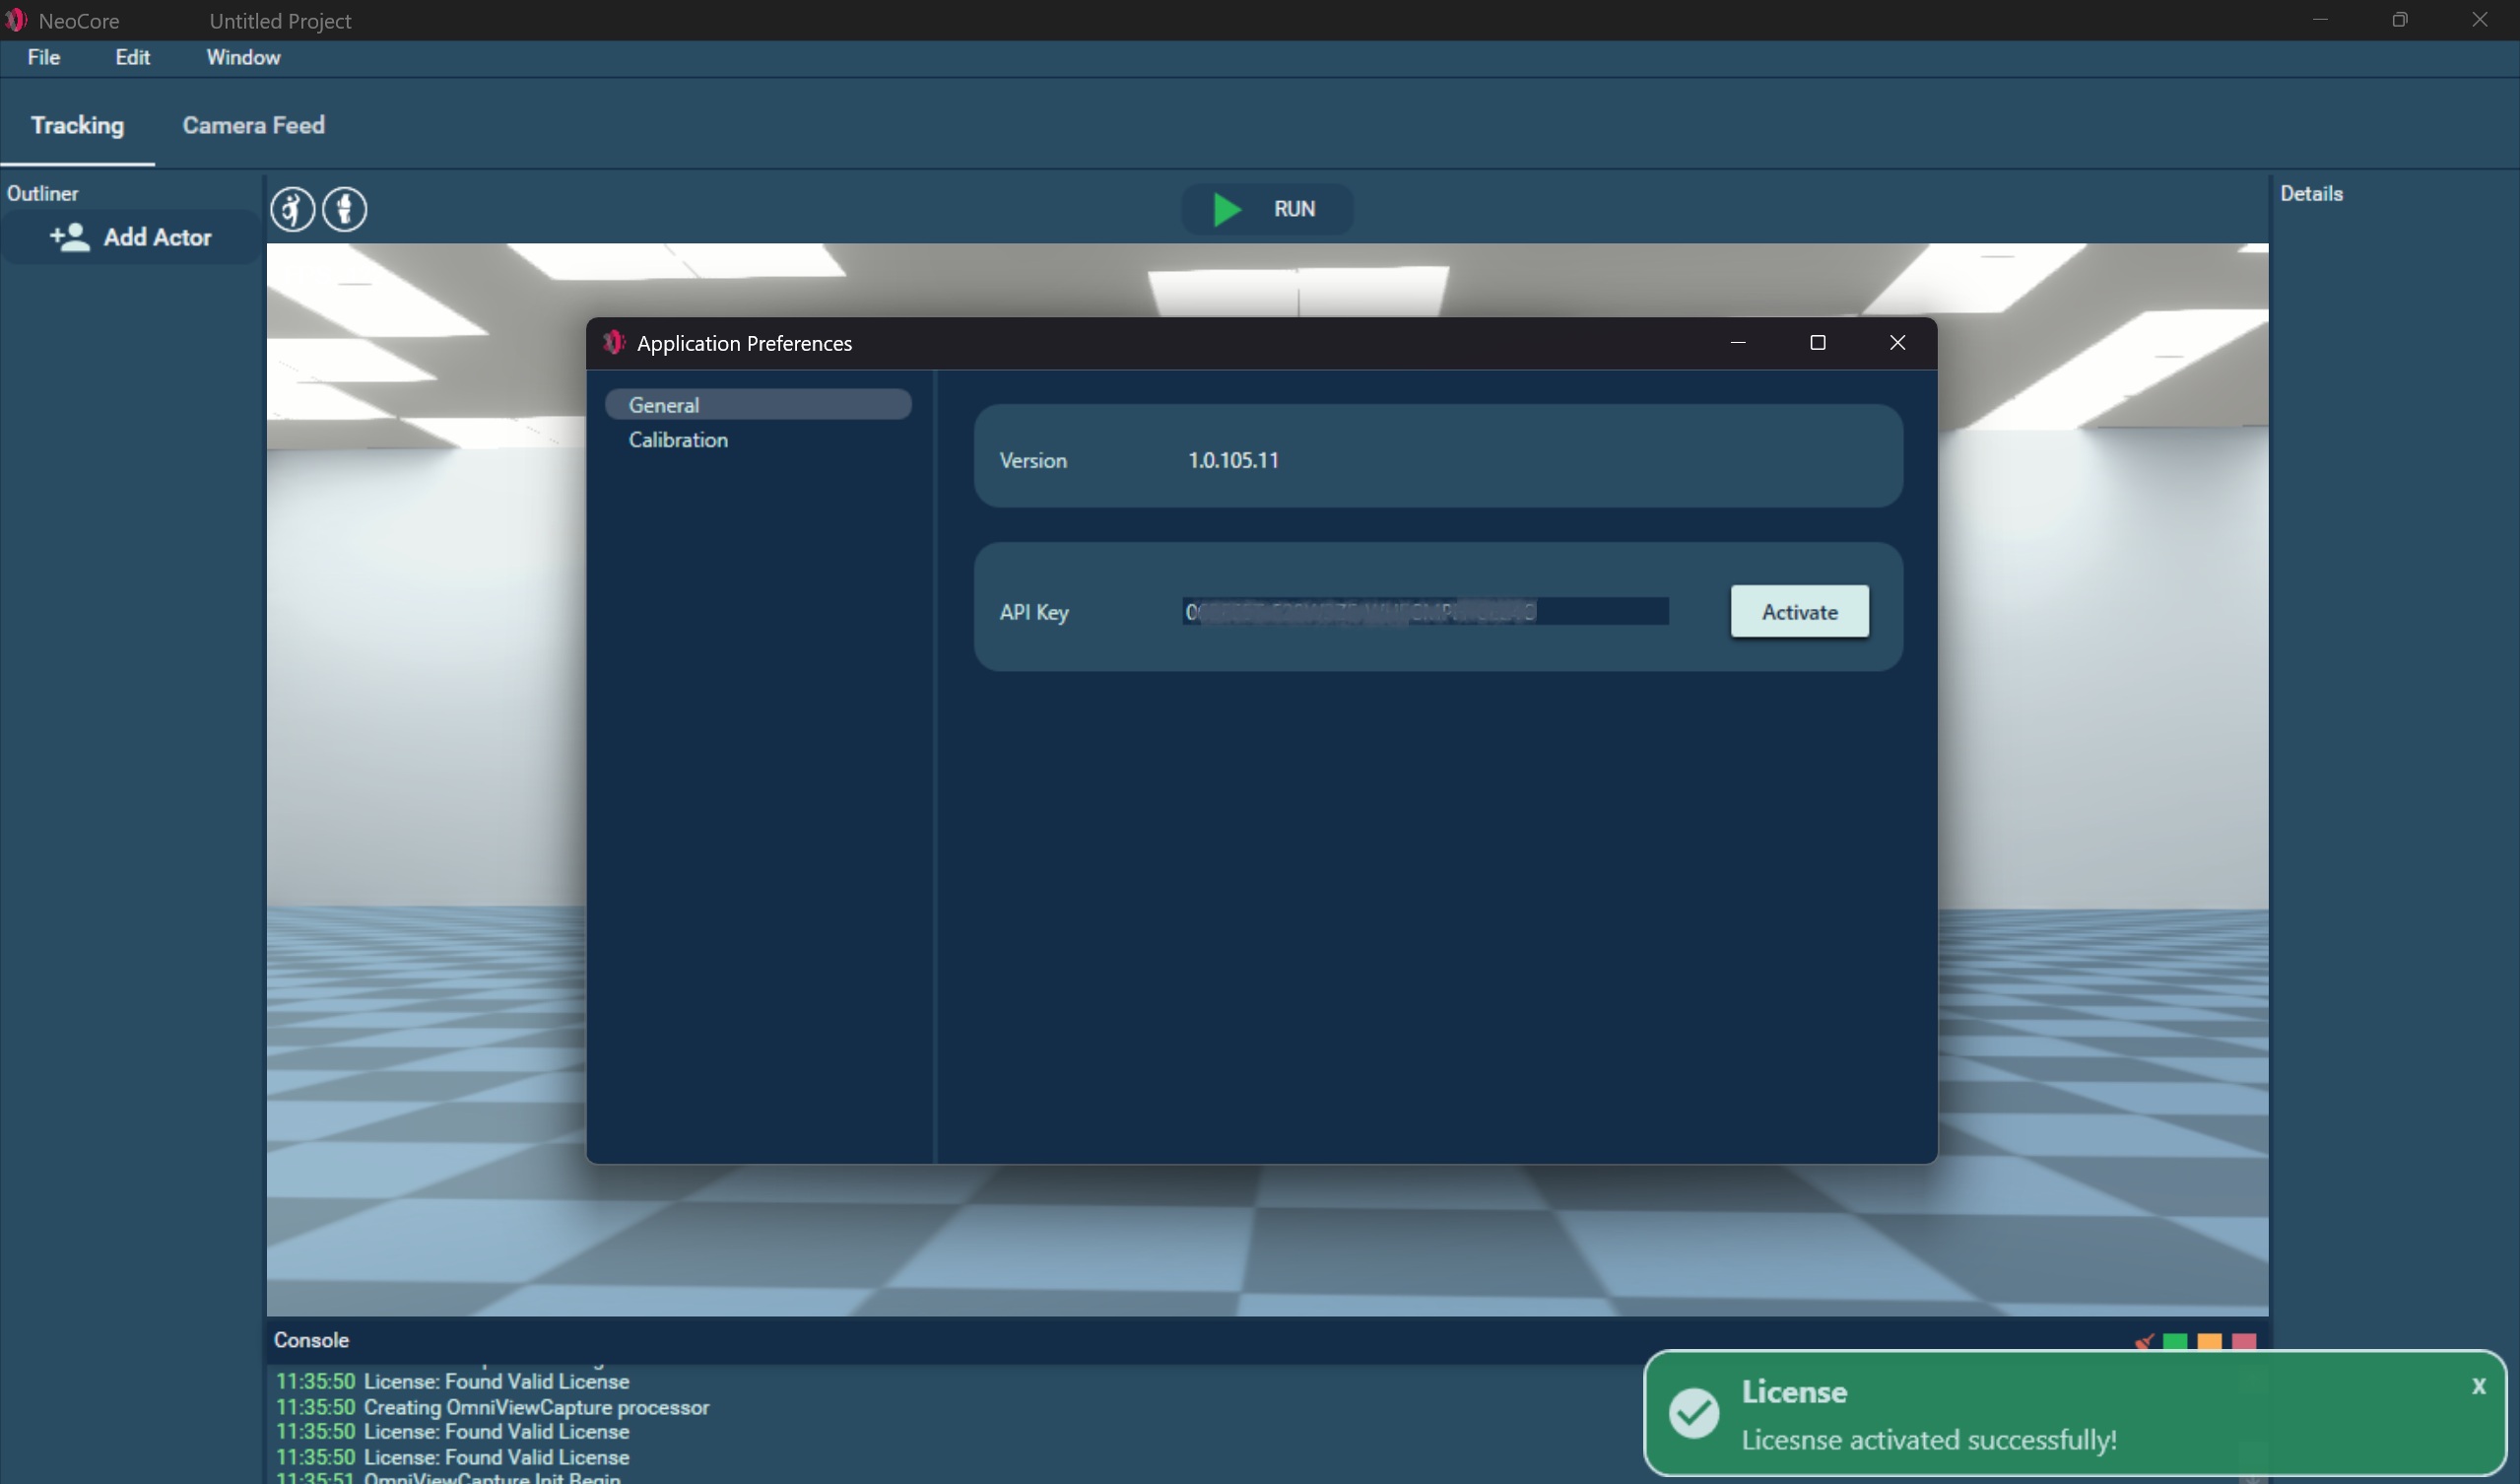
- Enter the key in General / API Key and press Activate.
2. Enable LiveLink Plugin
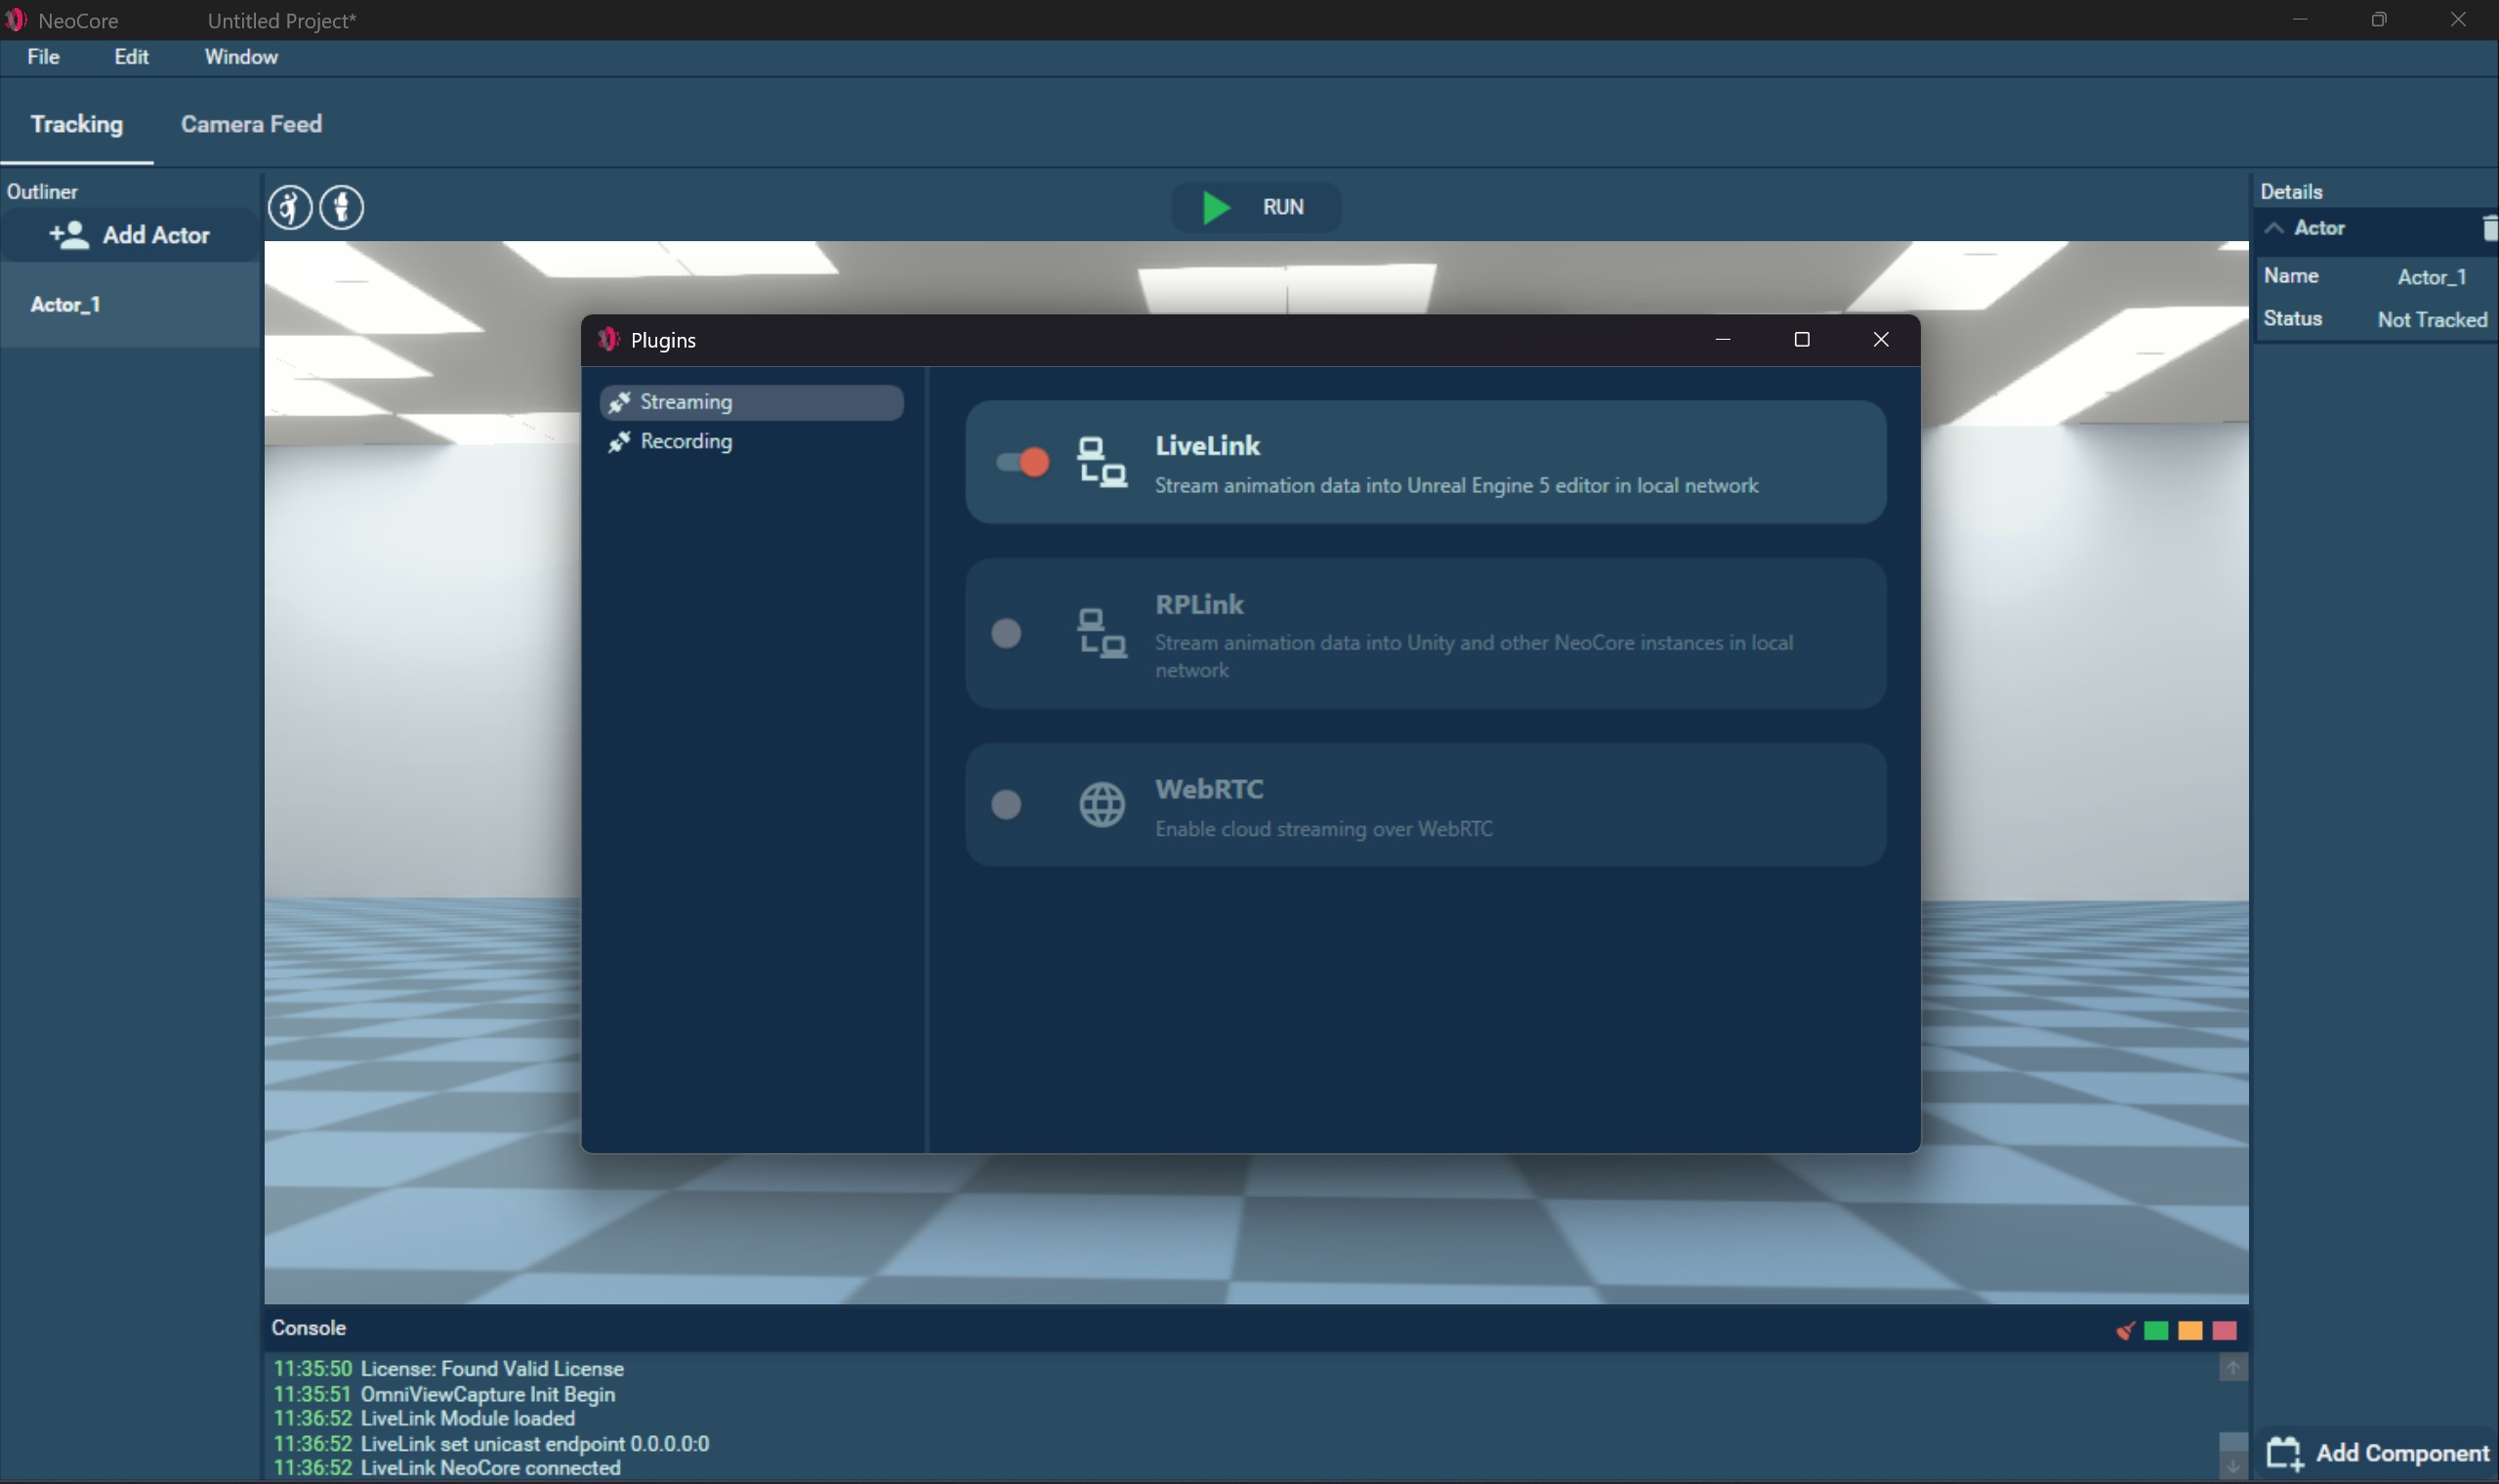
- Go to Edit > Plugins > Streaming and enable LiveLink
3. Attach LiveLink Component
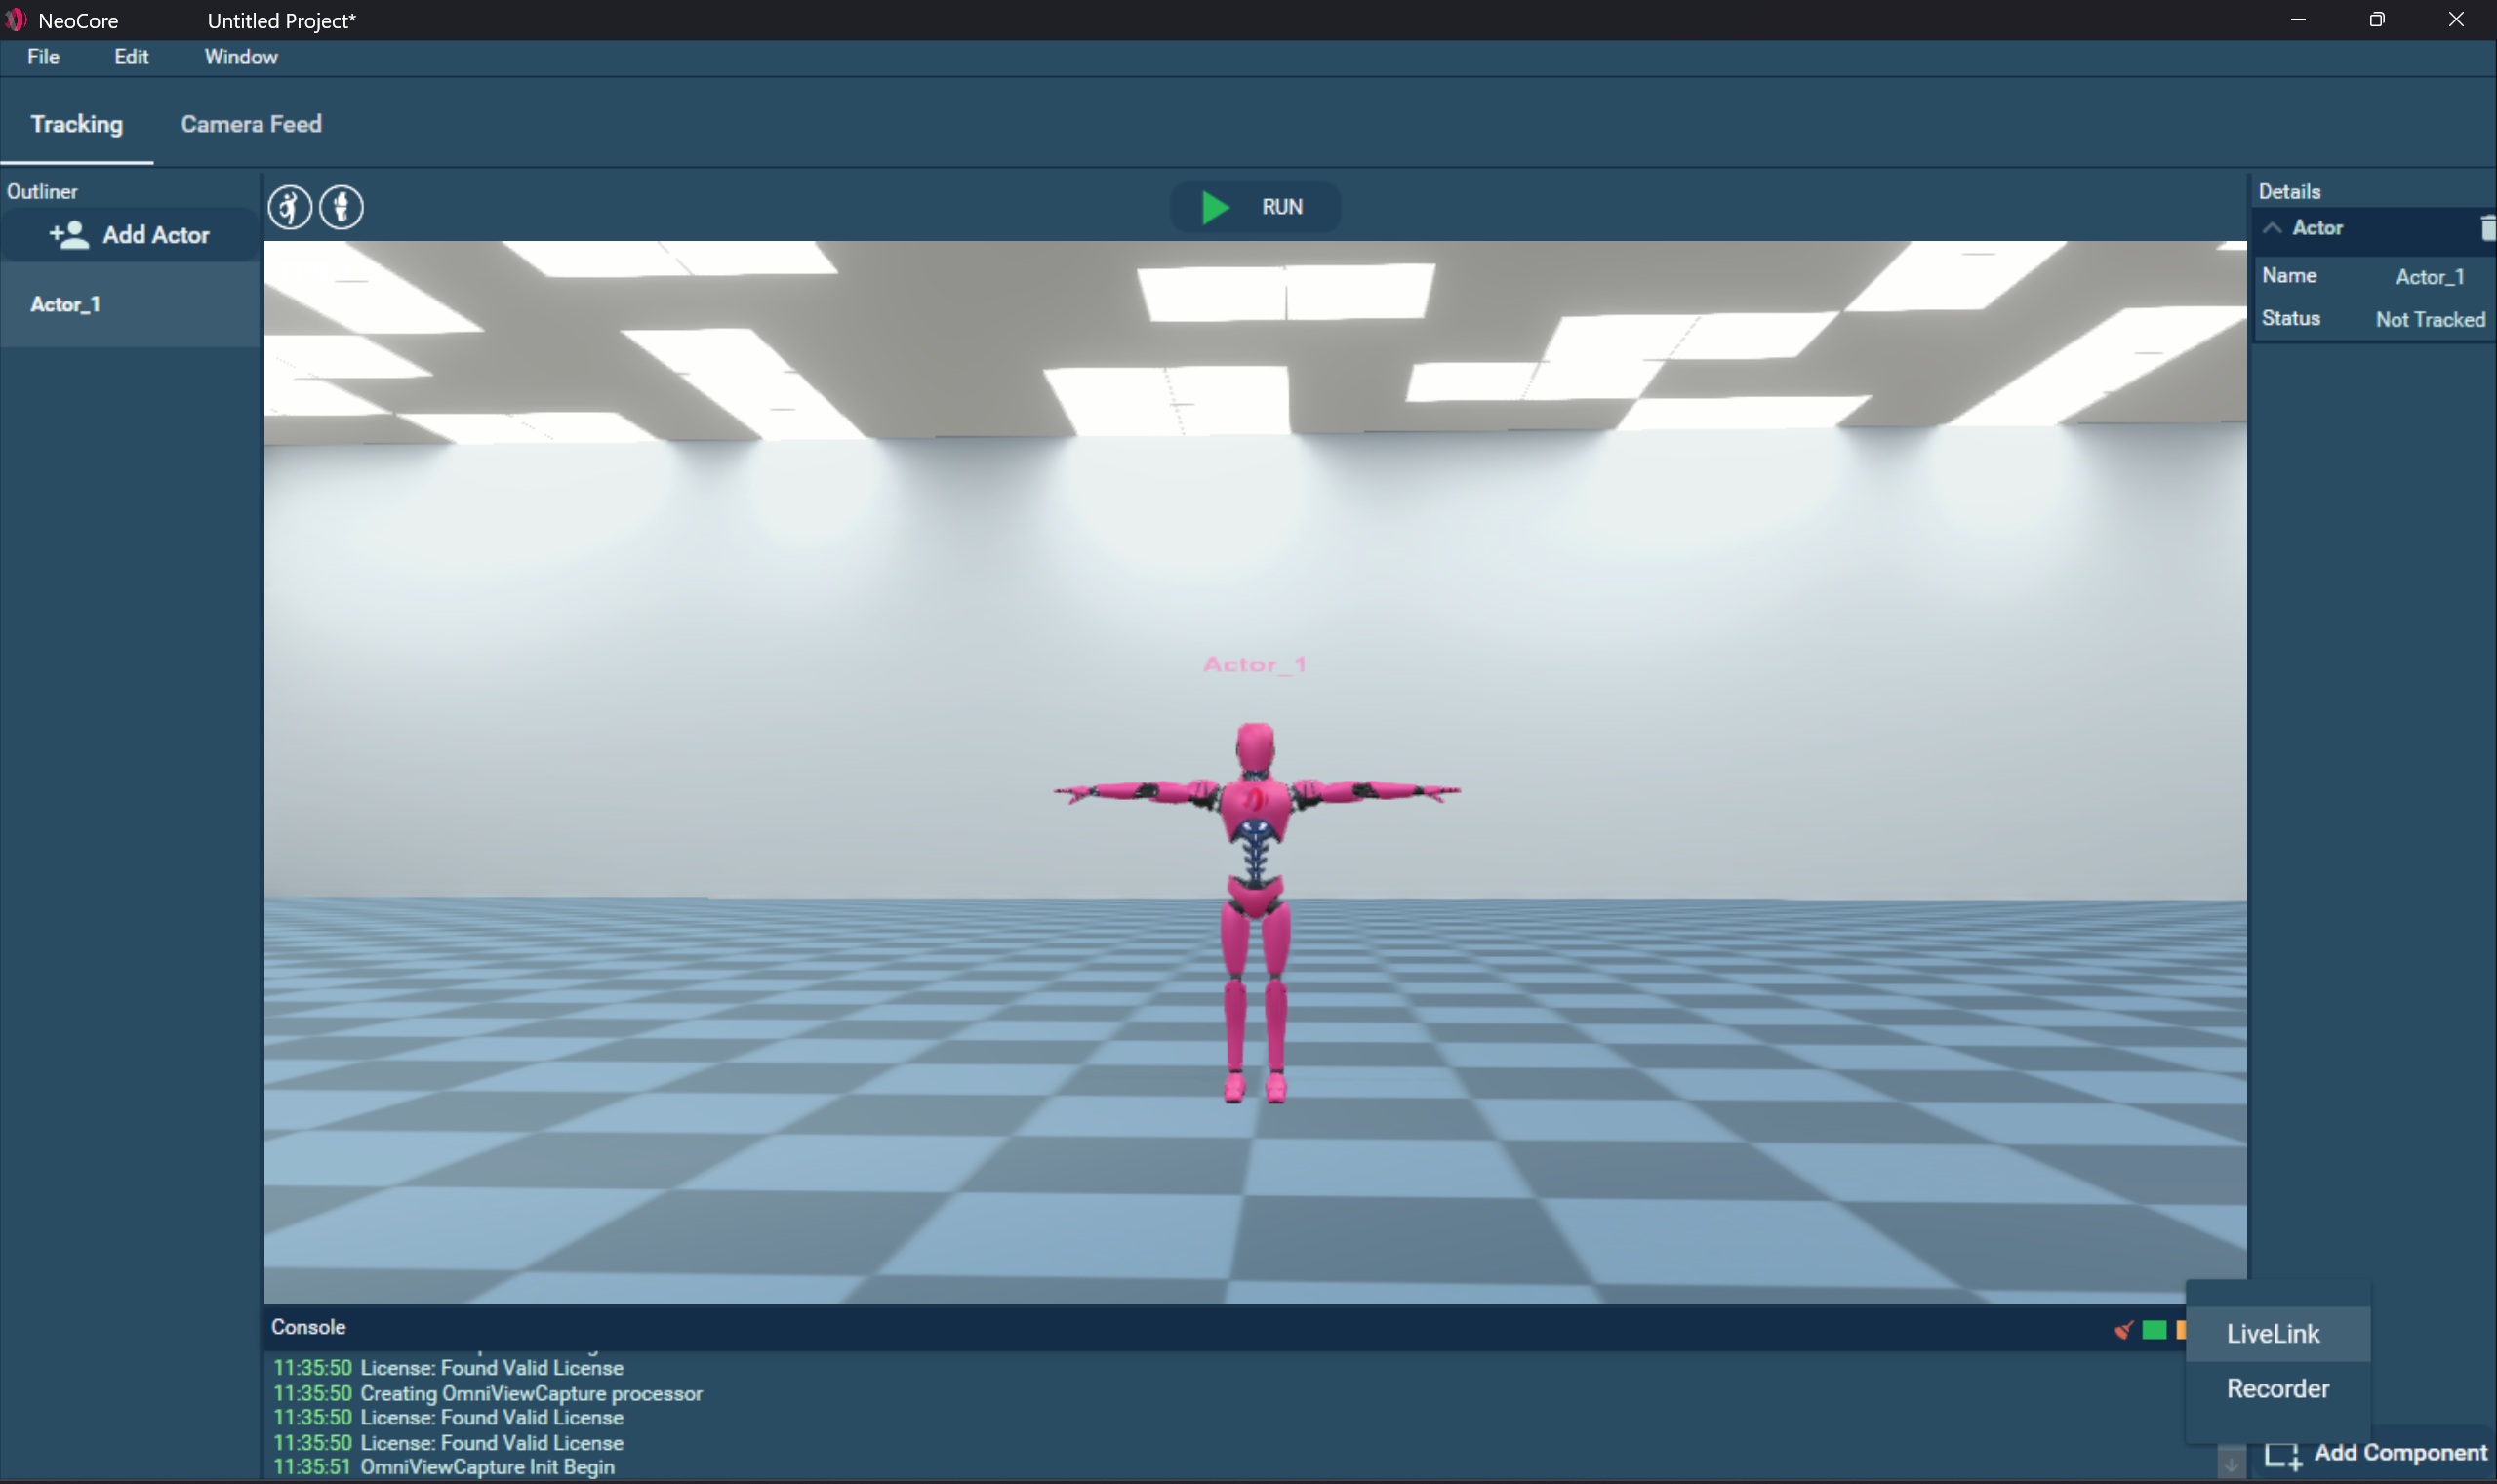
- Add Actor to the scene or select an existing one
- In the Details panel click on Add Component > LiveLink
- Repeat for each Actor you wish to stream
4. Rename LiveLink Subject

- To give the LiveLink Subject a custom name, rename it in the LiveLink Component in the Details panel.
5. Configure LiveLink Settings
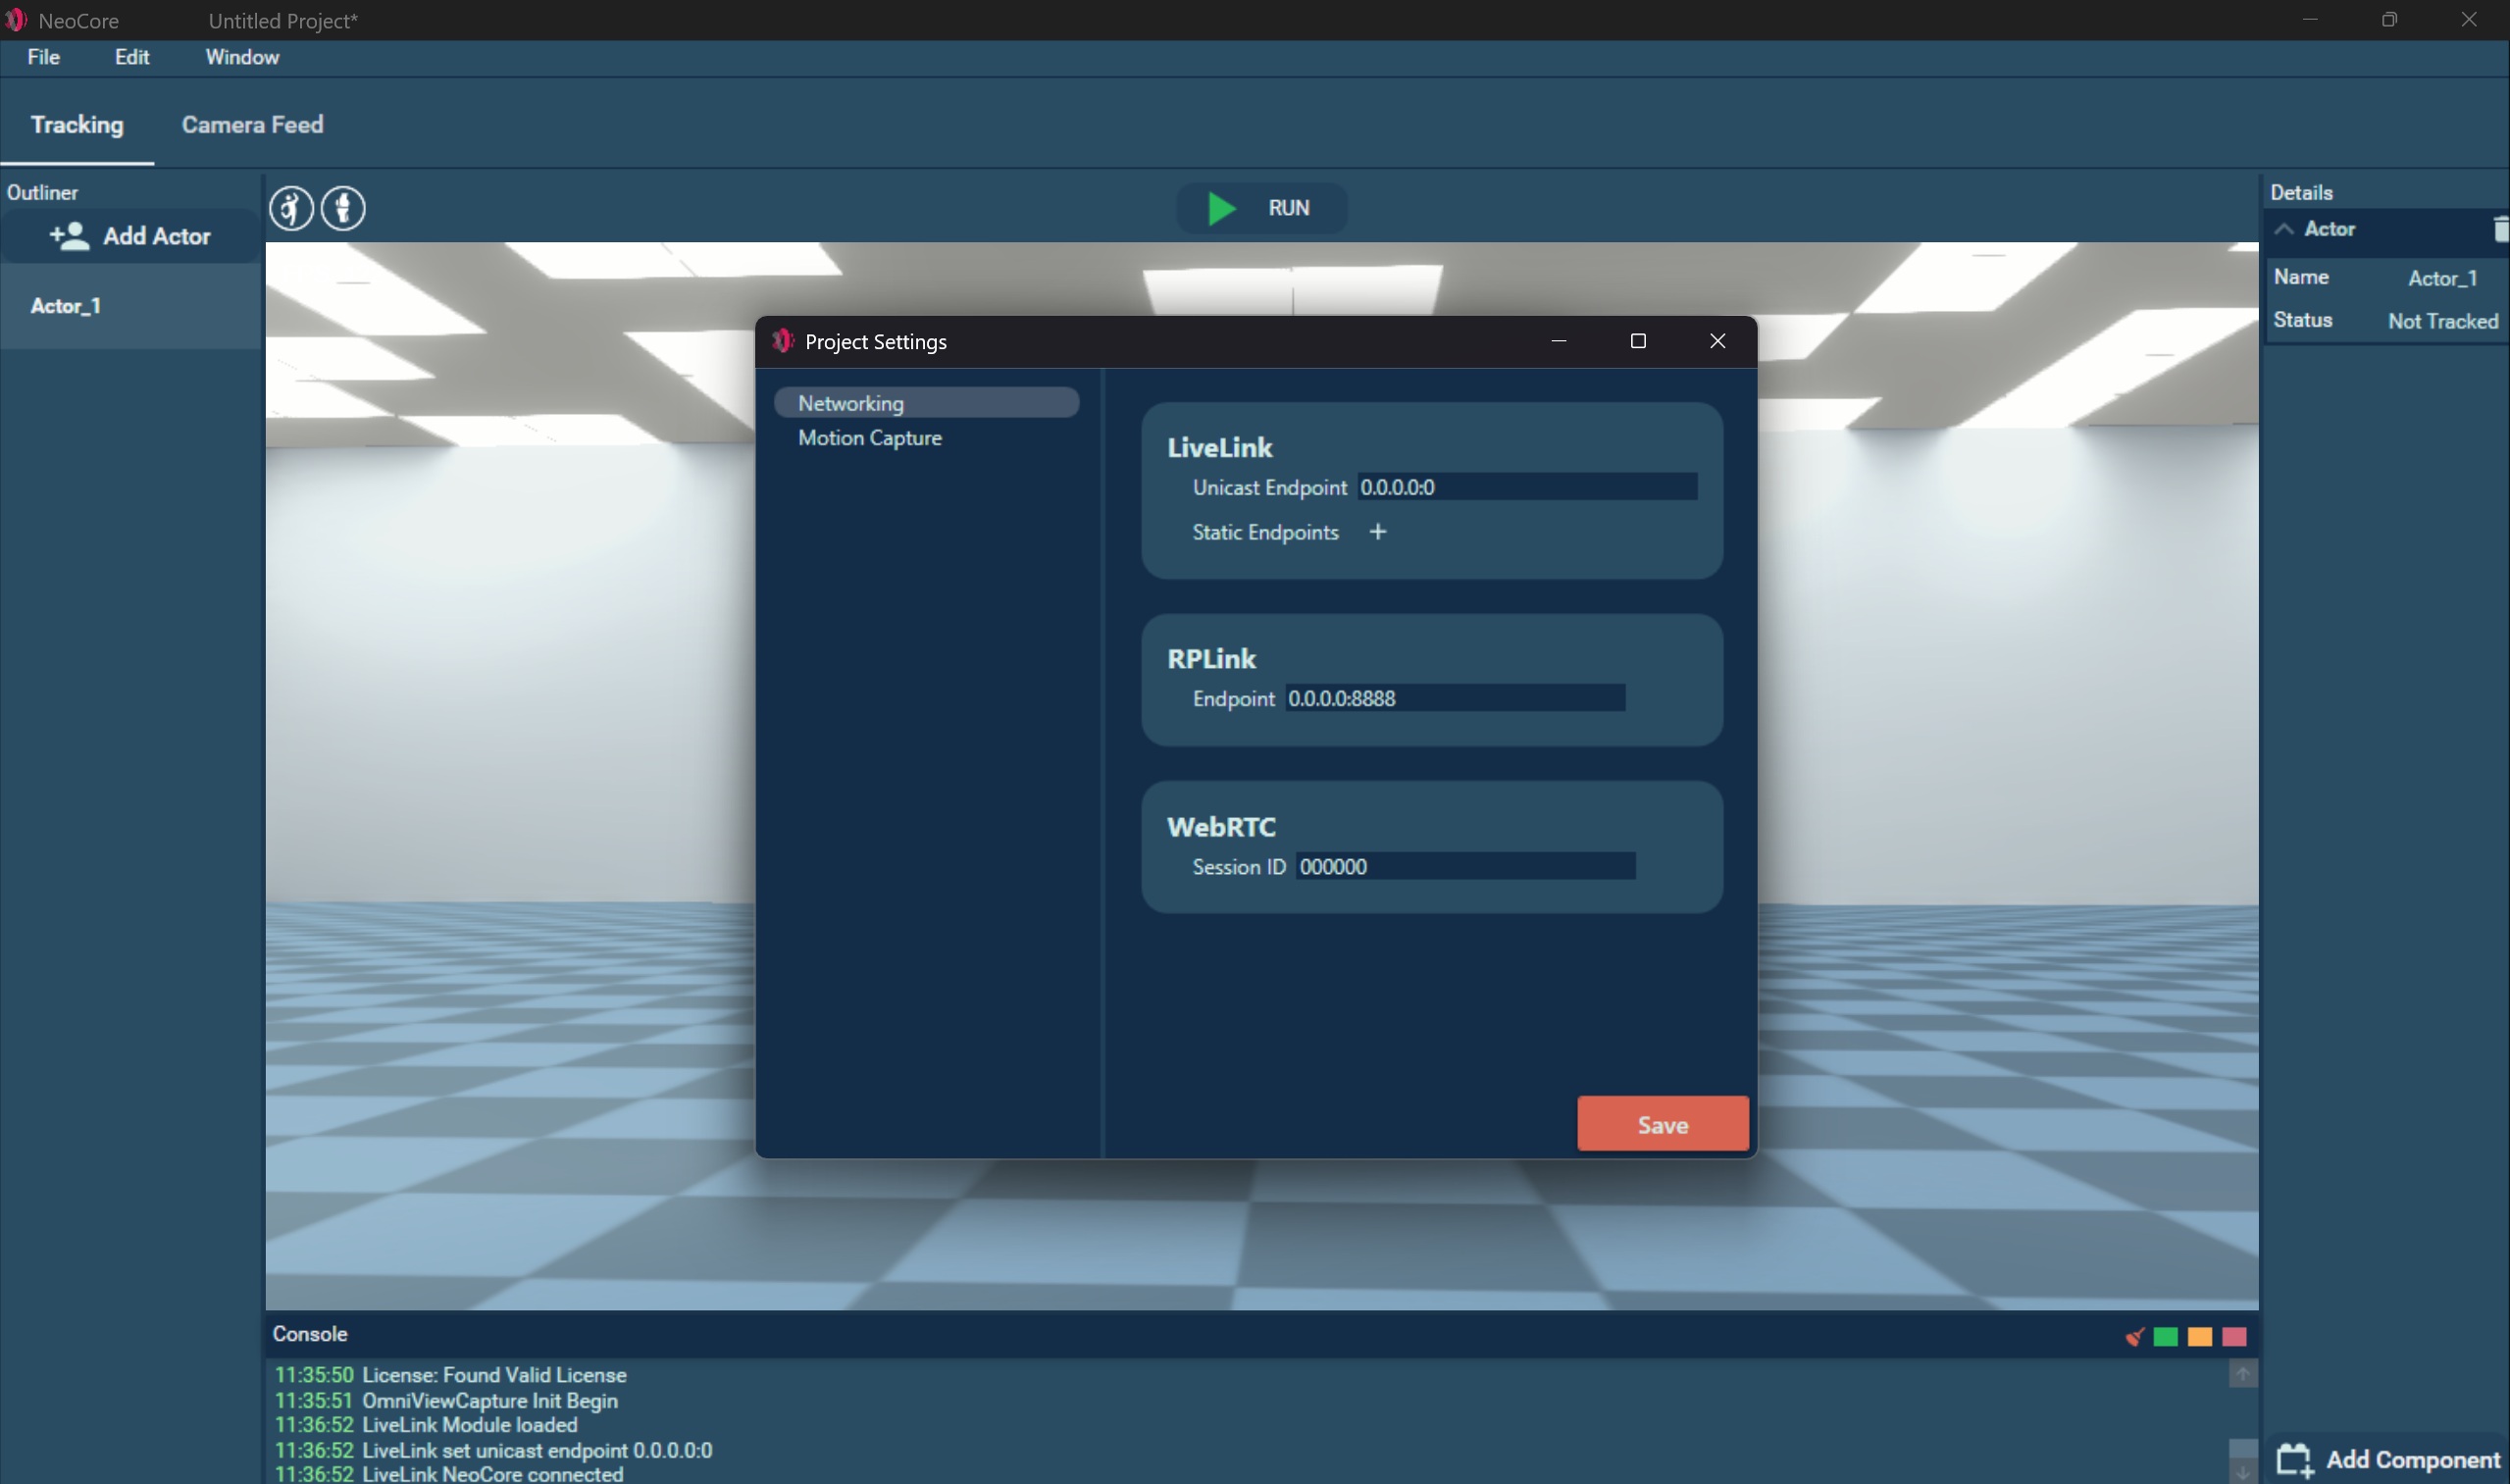
- Go to Edit > Project Settings > Networking > LiveLink
- Here you can change the default Unicast Endpoint and add Static endpoints the format is
IPAddress:Port.
TIP
If you are running NeoCore and Unreal in the same local network without additional routers between them you don't have to change the default settings. You may need to set your network to Private and allow NeoCore and Unreal through Windows Firewall
If you want NeoCore to keep track the various instances of Unreal that it should connect to:
a. Input the target IPv4 into Unreal's Unicast Endpoint field.
b. Add that same value to the list of NeoCore's Static Endpoints.
c. Repeat this for each device running Unreal.
If you want each instance of Unreal to keep track of the instance of NeoCore it should connect to:
a. Input the IPv4 value into NeoCore's Unicast Endpoint field.
b. Add the same value to Unreal's Multicast Endpoint field.
c. Repeat step 2 for each instance of Unreal.
6. Connect LiveLink to Unreal
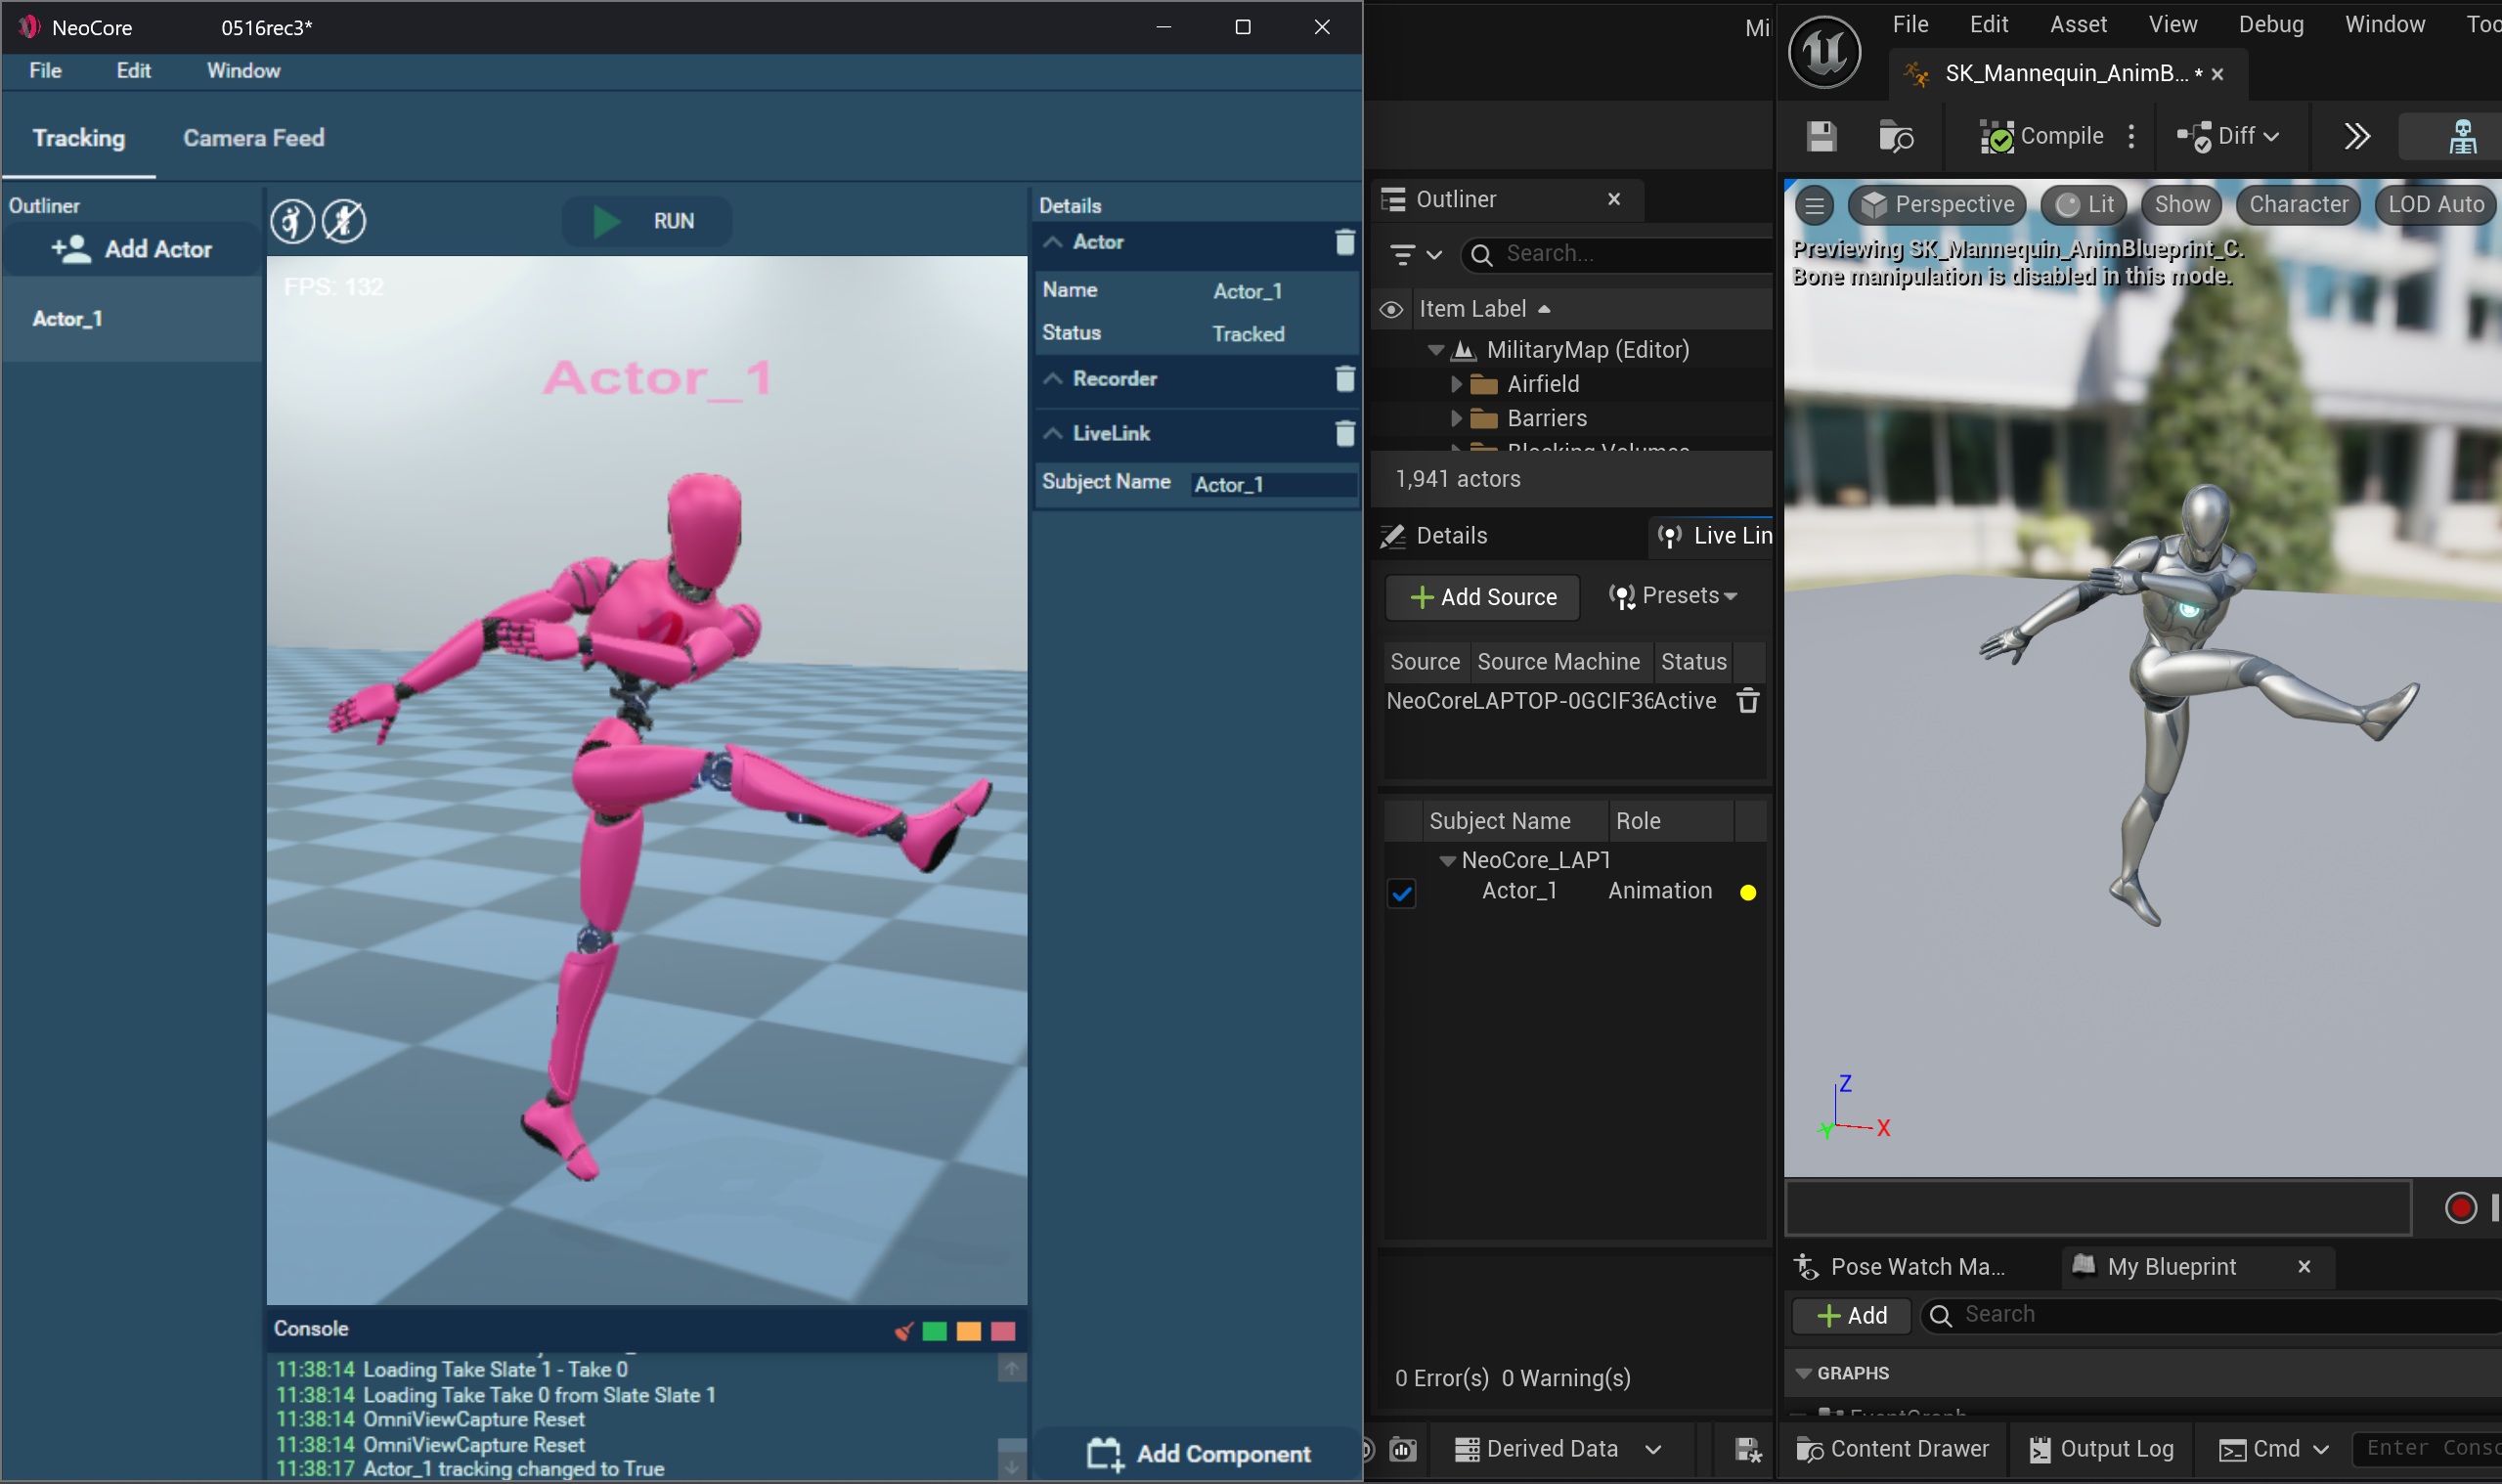
- In Unreal Engine 5 go to LiveLink > Add Source and choose the NeoCore source you wish to connect. The source name is
NeoCore_PC_NAME
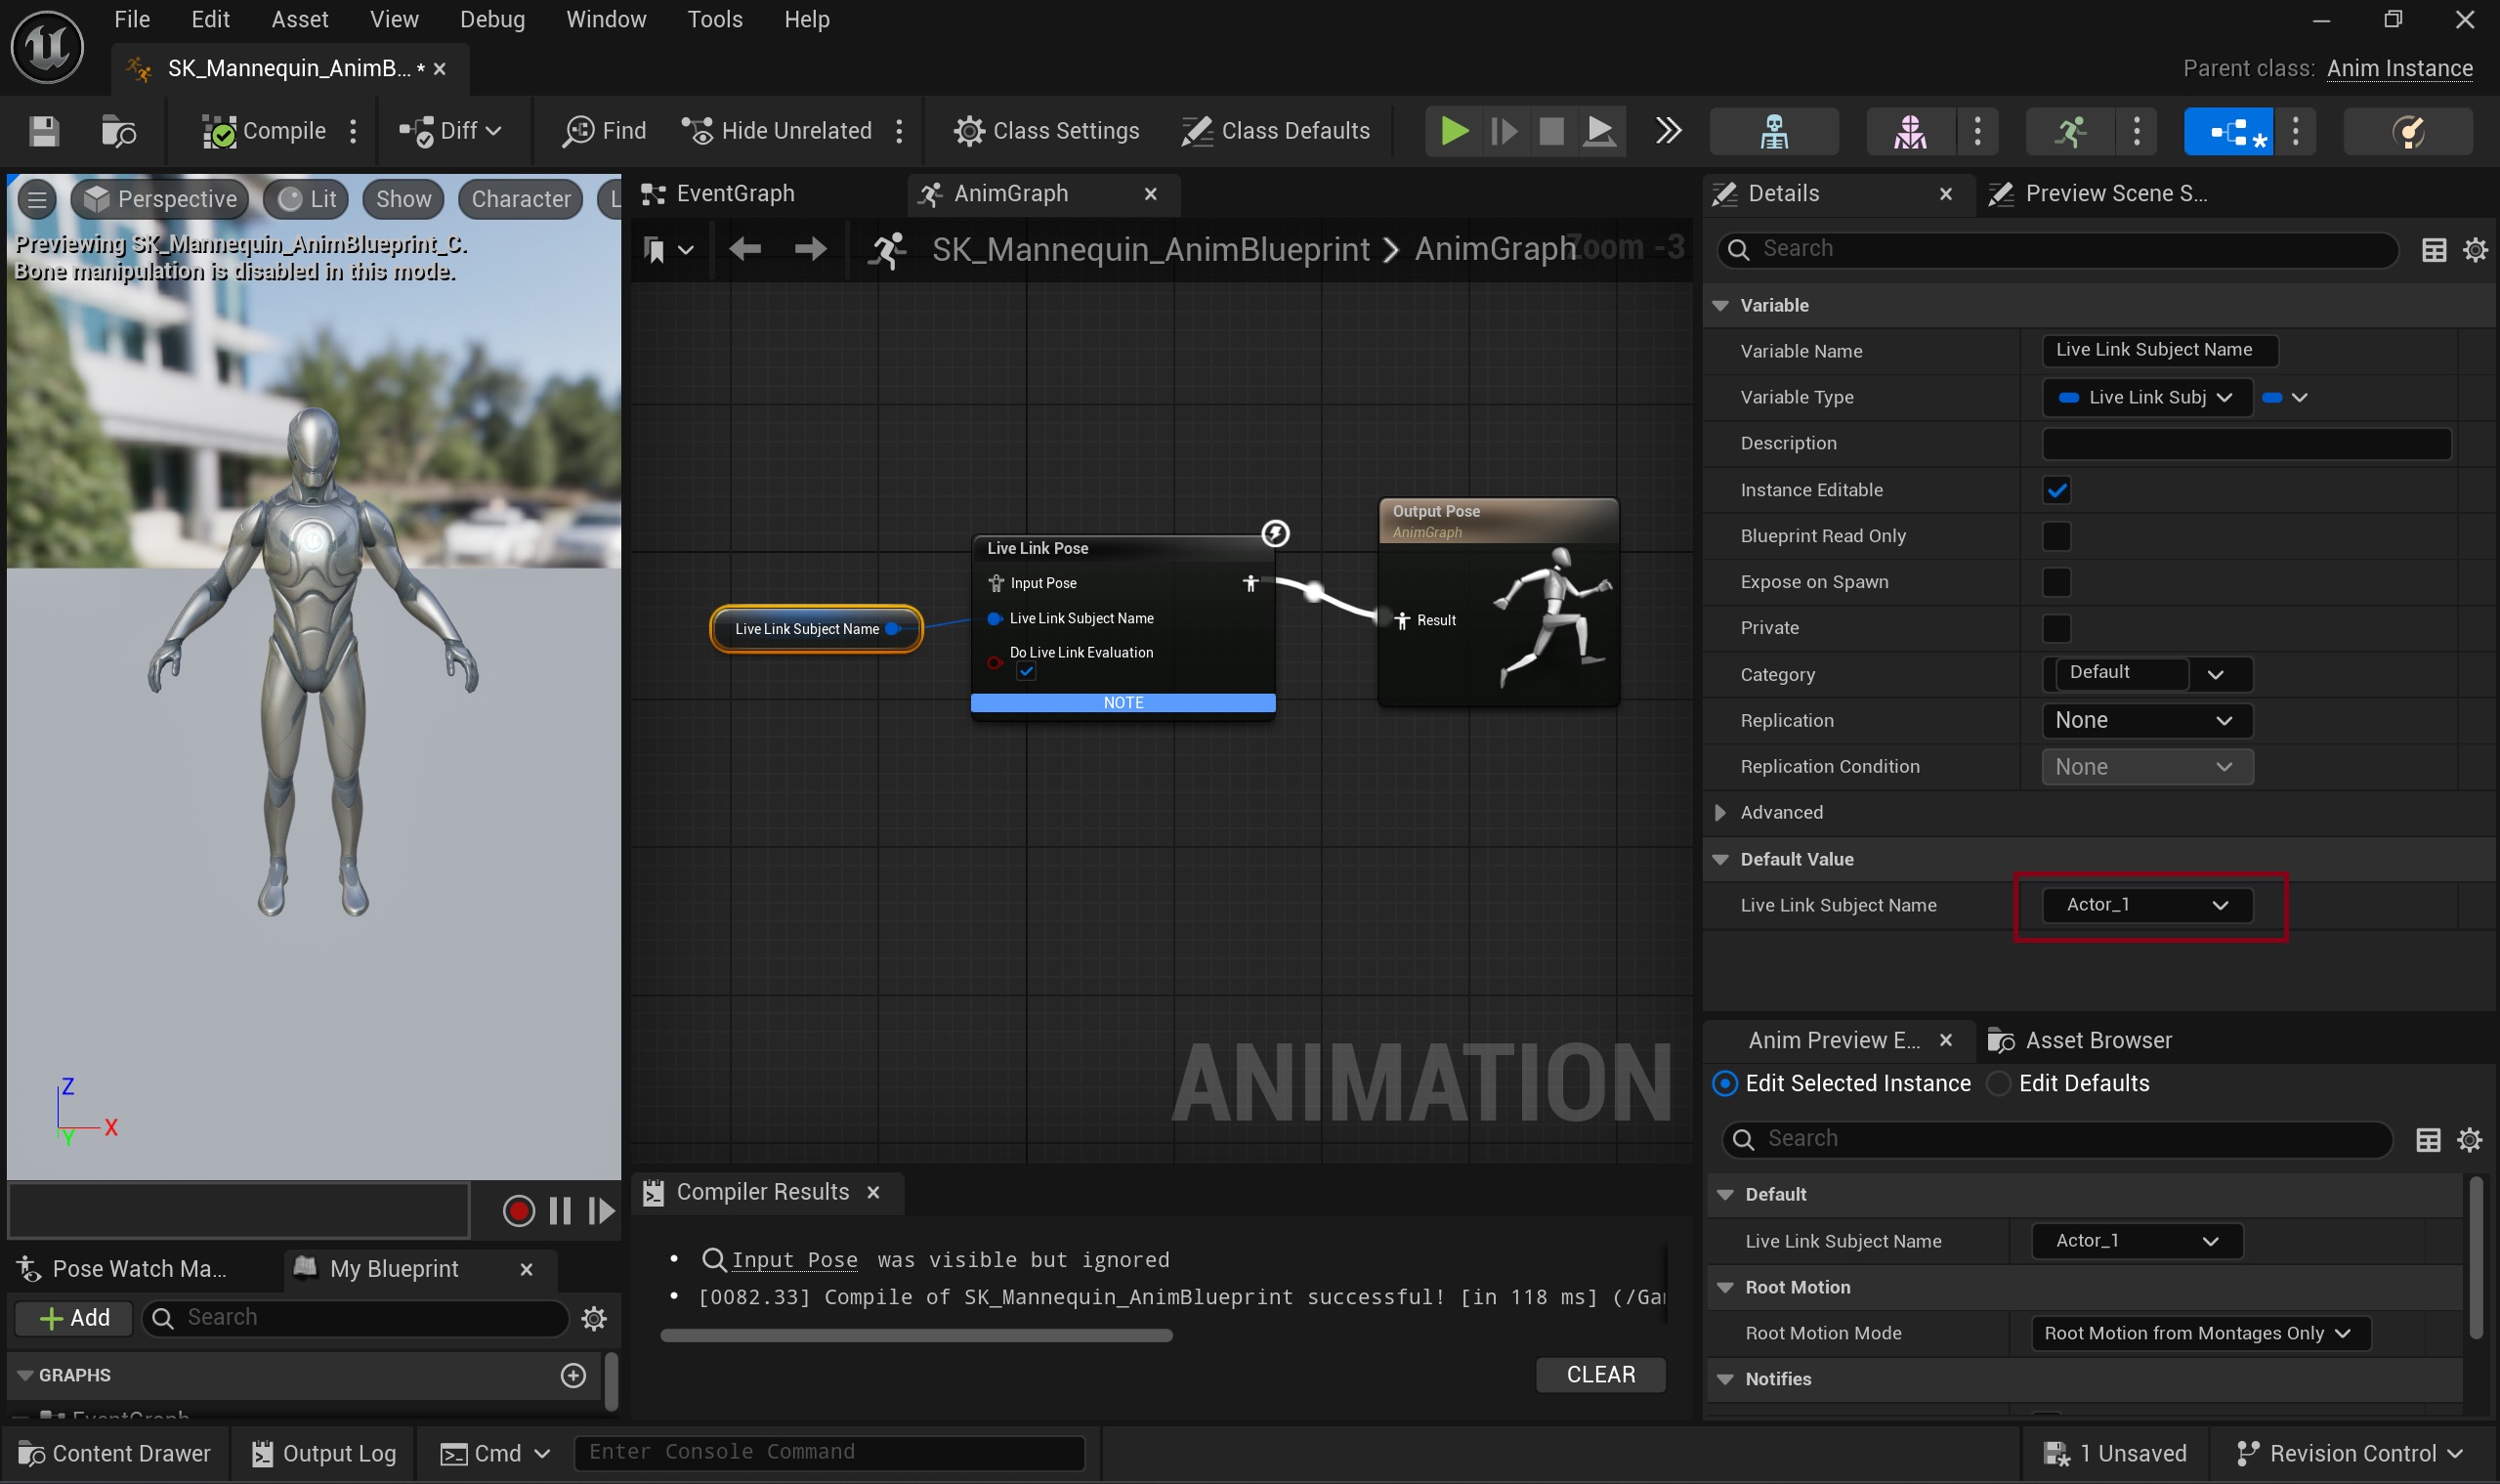
- Each Subject has the name specified in the LiveLink Component in NeoCore and has the UE5 Mannequin skeleton.
- It can be used directly as a Live Link Pose Source in the Mannequin Animation Blueprint.


